Welcome to the RMU Faculty Support for Blackboard website!
This site contains documentation to assist faculty with the most common Blackboard tasks.
To access Blackboard, please go to blackboard.rmu.edu.
The following web browser plug-ins must be installed on your machine for Blackboard to work properly. Please follow the links provided and install the plugin-ins on your computer.
- Adobe Acrobat Reader: http://get.adobe.com/reader/
- Java: http://www.java.com/en/
If you need more help, please contact the IT Help Desk x2211 or via help@rmu.edu , a support ticket will be created and you will be contacted as soon as possible.
Logging In / Changing Your Blackboard Password
Single Sign On (SSO)
Single Sign On technology is used to access Blackboard LMS. If you need to reset your password, please visit rmu.edu/passwordchange or contact the RMU IT Help Desk. Your Blackboard username and password are the same as your Sentry Secured username and password.
General Help for Instructors (YouTube)
Click the links below for tutorials and helpful hints.
-
Changing Your Blackboard Password
-
Blackboard LMS uses Single Sign On (SSO) user authentication.
To change your password, please visit https://rmu.edu/passwordchange.
For additional password help, visit Frequently Asked Questions or call the IT Help Desk (412-397-2211).
- Copying Content to a New Shell
-
Purpose Statement:
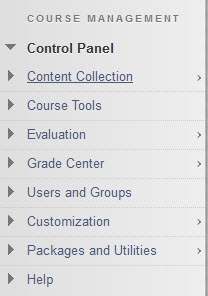
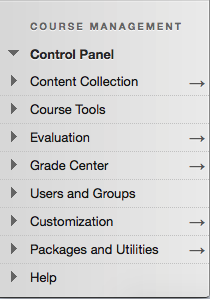
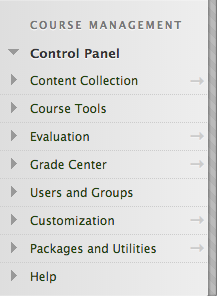
This work instruction shows users how to copy courses from one to another in Blackboard. Content can be reused from semester-to-semester, it only needs to be copied to the new semester’s shell. This document assumes that the user is logged into Blackboard and inside of a course shell.1. From the Course Management menu, look for the Control Panel, click the Packages and Utilities link.

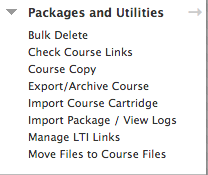
2. From the Packages and Utilities menu, click the Copy Course link.

The Copy Course page displays.
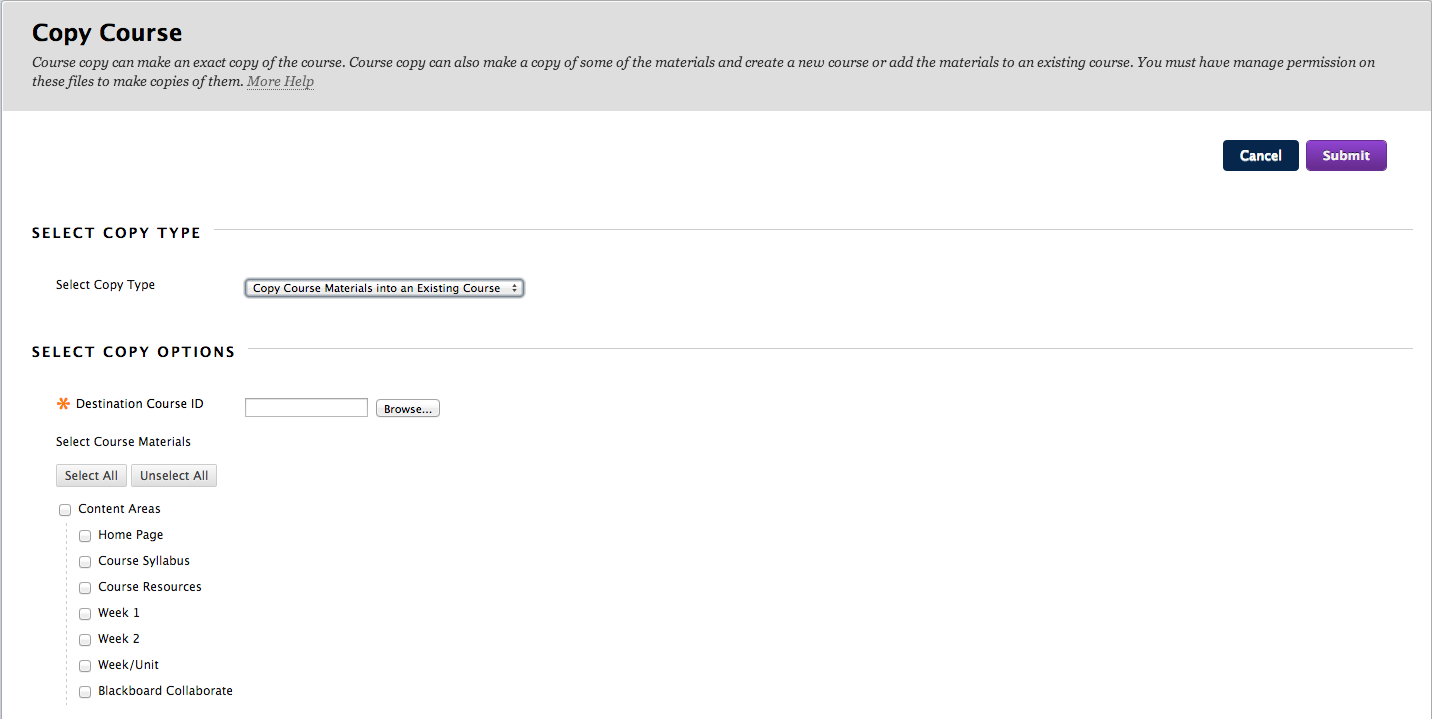
3. From the Select Copy Type drop-down menu, select the Copy Course Materials into an Existing Course option.

4. From the Select Copy Options section, click the Browse button.
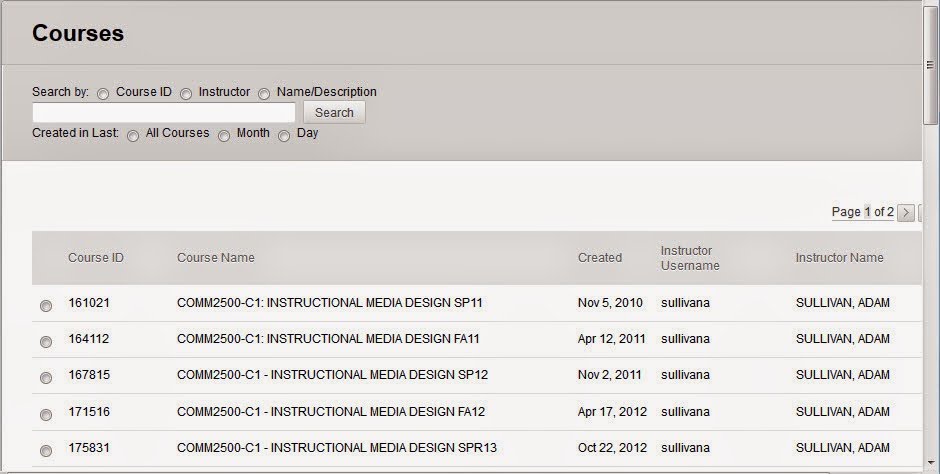
The Courses window displays.

5. Click to select radio button of the course to which the content will be copied.
IMPORTANT NOTE: You can only copy content to one course at a time. To copy the content to more than one course, the process must be repeated.
6.
 Click the Submit button to confirm the course selection.
 The Copy Course page displays and the Destination Course ID field is populated with the Course ID of the selected course.

7.
 From the Select Course Materials section, click the Select All button.
IMPORTANT NOTE: All of the necessary checkboxes needed for a successful copy are selected. No additional checkboxes require selection.
8. DO NOT make any changes to the File Attachments section.
9. DO NOT select the Include Enrollments in the Copy checkbox. If this checkbox is selected, all enrolled students will be copied to the new shell.
10.
Click the Submit button. A confirmation will be emailed. IMPORTANT NOTE: Please allow up to 12 hours for the copy to be successful. While this amount of time may not be needed, it will ensure that all content is properly copied.
- Creating Content
-
- Creating a Collaborate Ultra Session
-
Creating a Collaborate Ultra Session
- Creating a Custom Grade Center Column
-
Purpose Statement:
Creating a custom column in the Blackboard Grade Center is a very easy process and provides flexibility for using the Blackboard Grade Center with traditional courses. This document assumes that users are logged in to Blackboard and in a course.1. From the Control Panel, click Grade Center. The Grade Center menu displays.
2. From the Grade Center menu, click Full Grade Center. The Full Grade Center displays.

3. Click the Create Column button. The Create Grade Column page displays.
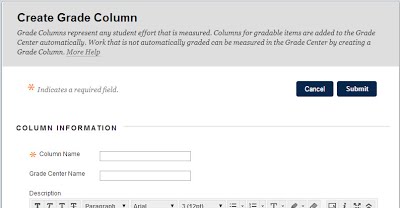
4. In the Column Name field, enter a name for the column. This is the display name for the column.
5. If desired, in the Grade Center Name field, enter an optional column name. This is optional.
6. If desired, in the Description field, enter a description of the column.

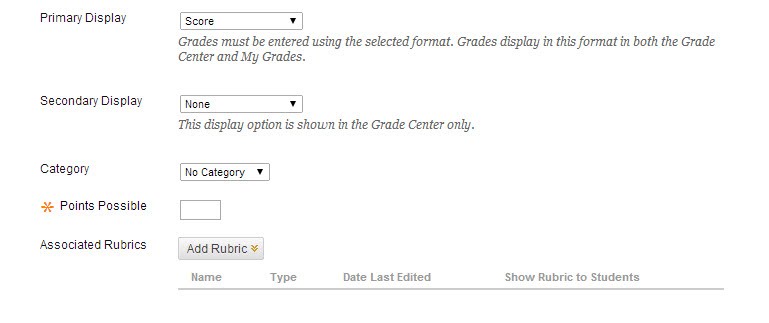
7. From the Primary Display drop-down, select the primary display for the column. Choices include Score, Percentage, Letter, and Complete/Incomplete.
8. If desired, from the Secondary Display drop-down menu, select a secondary display for the column. Choices include Percentage, Letter, and Complete/Incomplete.
9. In the Points Possible field, enter the total number of points for the column. This is a required field.
10. If desired, click the Add Rubric button to associate a rubric to the column.

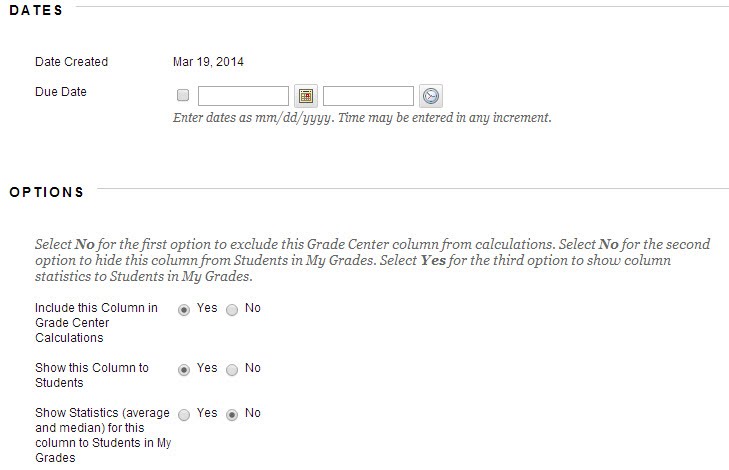
11. If desired, in the Due Date field, select a date and time. It is recommended not to use a due date
12. To Include this Column in Grade Center Calculations, click to select the Yes radio button
13. To Show this Column to Students, click to select the Yes radio button
14. To Show Statistics for this Column to Students in My Grades, click to select the Yes radio button.
15. Click the Submit button. The custom column is created and placed as the last column in the Grade Center.
- Creating a Discussion Forum
-
Purpose Statement:
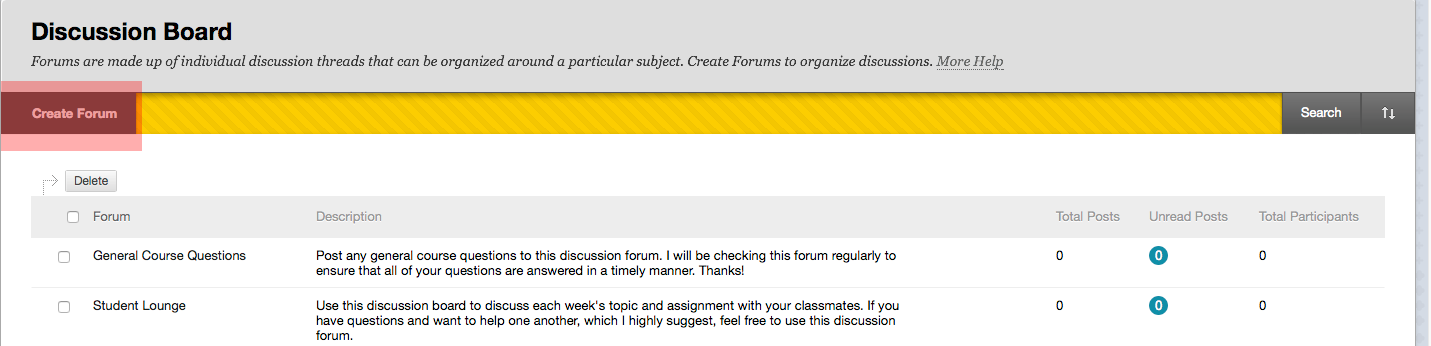
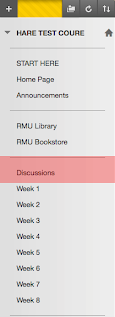
The purpose of this procedural document is to provide instructions on how to create a discussion forum in Blackboard. This procedural document assumes that users are logged in to Blackboard and in an active course shell.1.From the left-hand navigation menu, click the Discussions link.
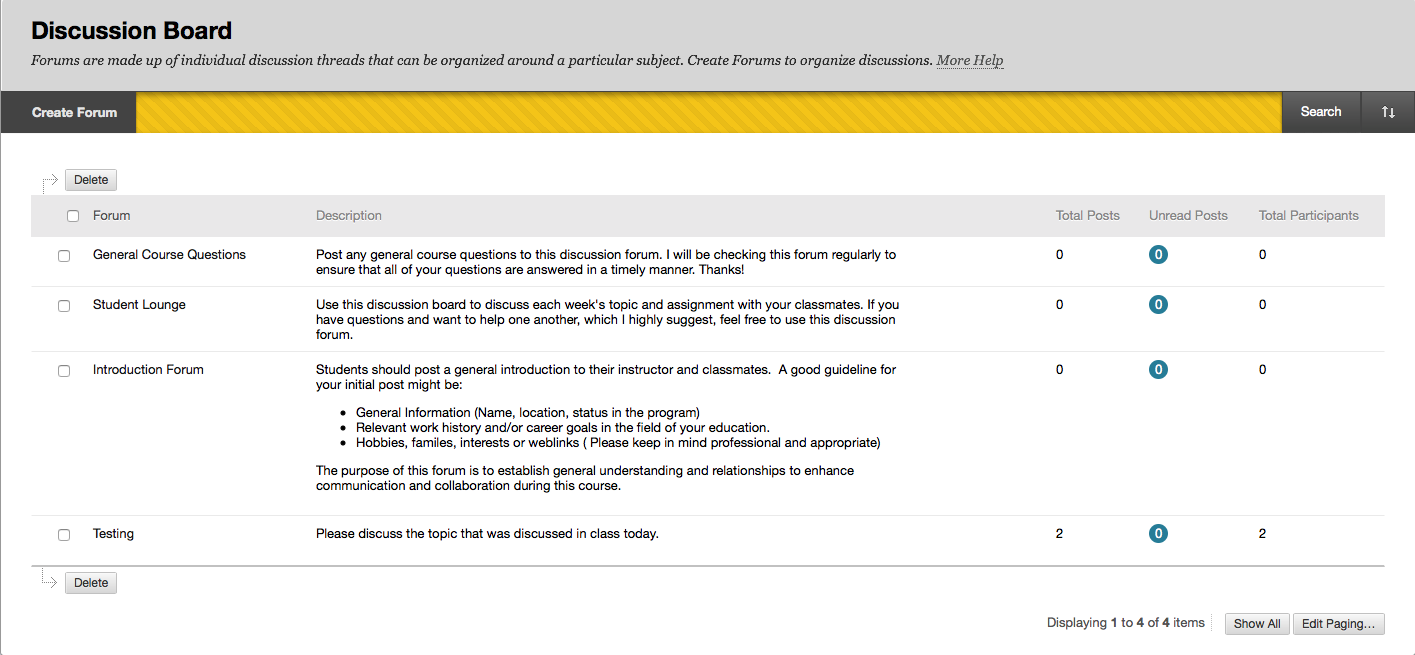
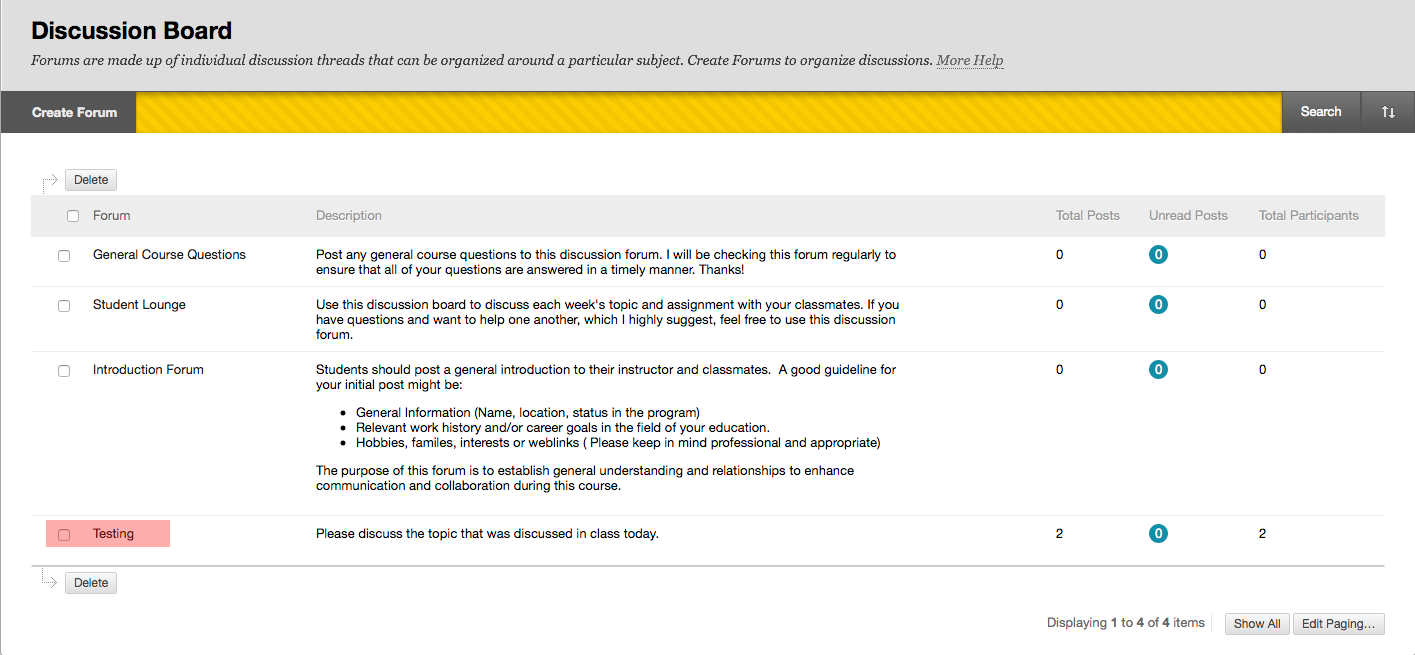
The Discussion Board page displays.

The Discussion Board page lists all of the discussion forums in the course.
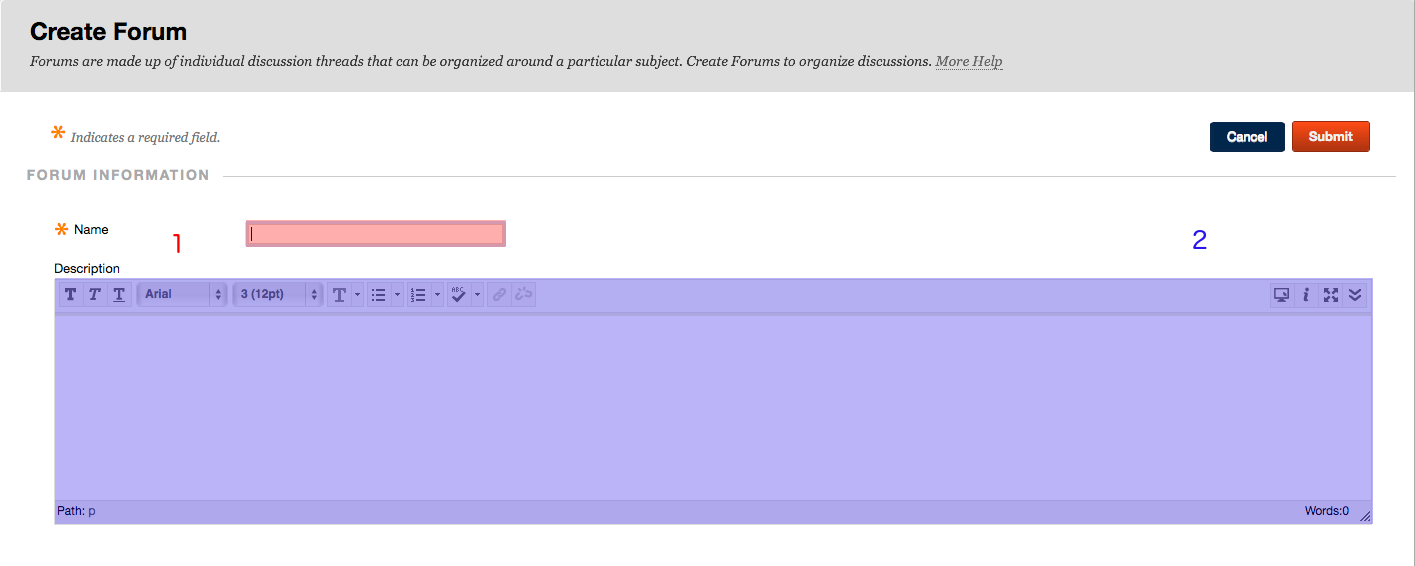
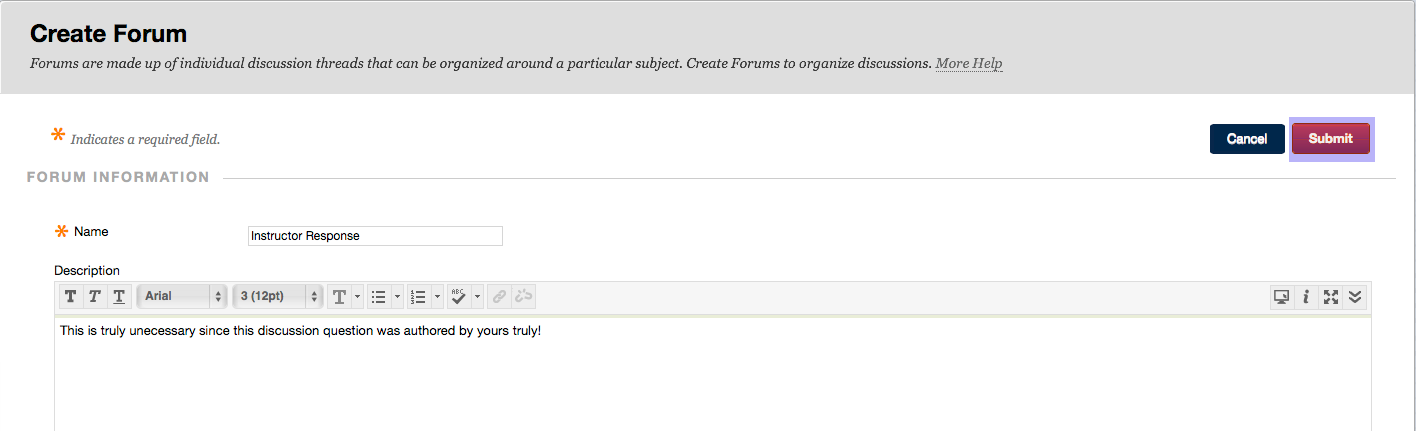
2. Click the Create Forum button.The Create Forum page displays.
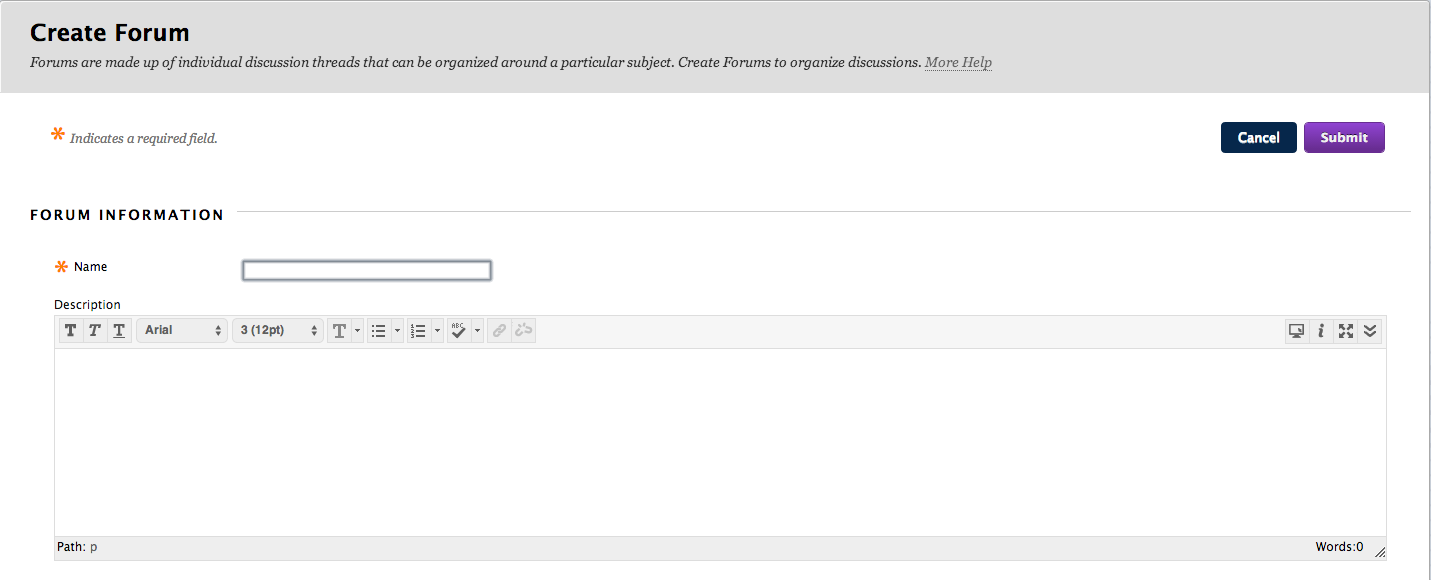
3. In the Name field, enter a name for the discussion. The name entered here is also the name that will be displayed in the Grade Center.
4. In the Description field, enter the discussion question that students will answer.
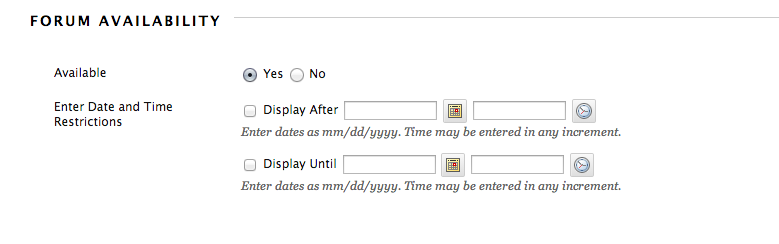
5. From the Forum Availability section, select whether the forum will be available to students or set date restrictions for the discussion forum.
From the Forum Settings section, accept all of the defaults for the checkboxes and the Subscribe sub-section.
6. From the Grade sub-section, click to select the Grade Discussion Forum radio button and enter a point value for the discussion forum in the Points possible field.
7. Do not uncheck the Show participants in “needs grading” status checkbox. Leaving this selected will alert you, via the Grade Center that students have participated and the forum can be graded.
8. If desired, use the Add Rubric menu to associate a rubric with this discussion.
9.
 Click the Submit button. The discussion forum is successfully created.
After creating the discussion forum, you may want to create a link to the discussion from within a content area.
To do so, visit the Linking a Discussion Forum to a Content Area page. - Creating a SafeAssignment
-
Purpose Statement:
This work instruction shows users how to create a SafeAssignment in Blackboard. A SafeAssignment checks the students’ paper against a database to verify that the submission has not been plagiarized. This document assumes that the user is logged into Blackboard and inside of a course shell.1. Click the course you wish to edit. In this case it is Week 1.

2. Hover the mouse over the Assessments button. The Assessment menu will display.
3. From the Assessments menu, click the SafeAssignment link.
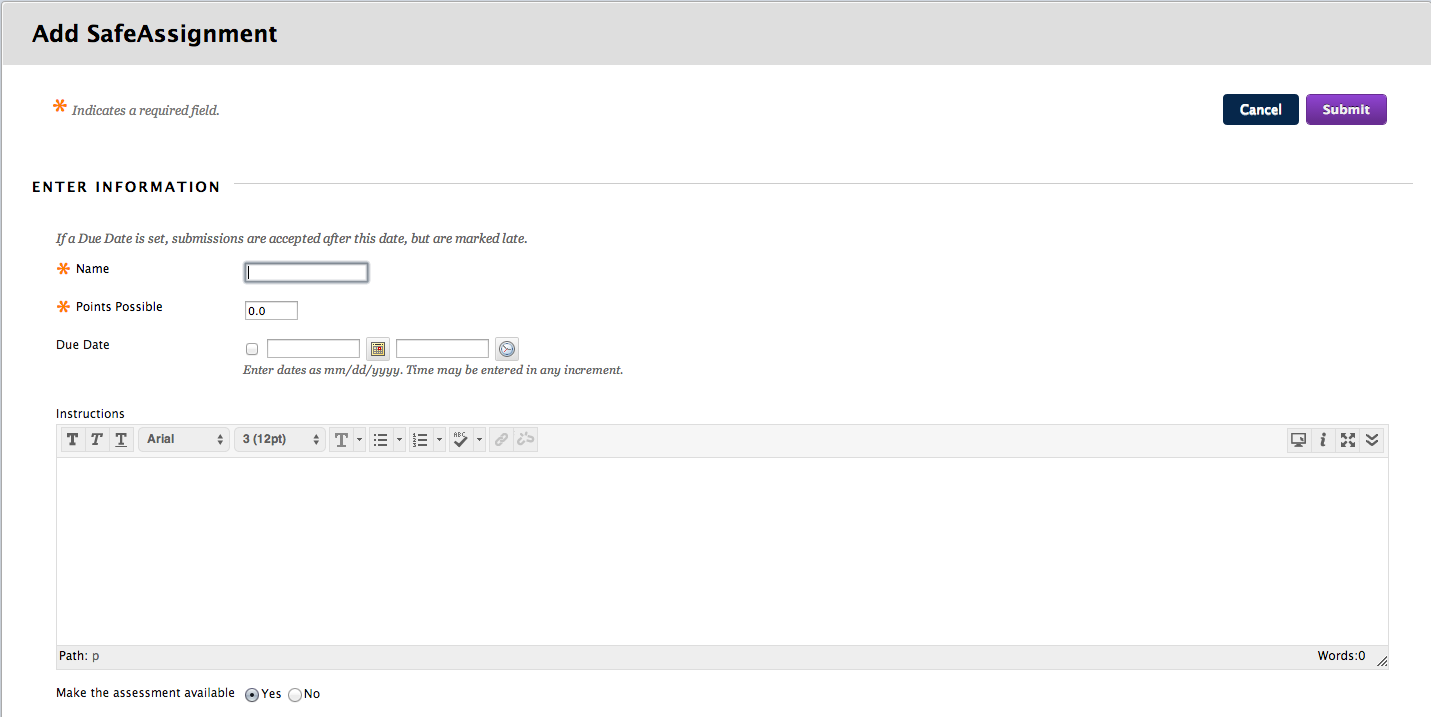
The Add SafeAssignment page displays.

4. In the Name field, enter a name for the SafeAssignment. This is a required field.5. In the Points Possible field, enter the number of points the SafeAssignment is worth. This is a required field.
6. Ensure that the Make the assessment available radio button is set to Yes. Date restrictions can be used to hide the SafeAssignment from student view.
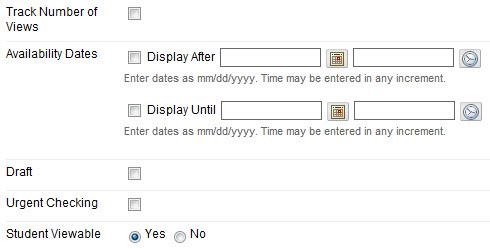
7. If desired, click to select the Track Number of View checkbox.
8. If desired, set display dates using the Availability Dates option.
9. Click to select the Draft checkbox if students are permitted to submit drafts to check for plagiarism.
IMPORTANT NOTE: If the Draft checkbox is selected, a separate SafeAssignment must be created for students to submit a final version.
10. Click to select the Urgent Checking checkbox if papers should be checked immediately.
11. If students are permitted to view the SafeAssignment reports, ensure that the Student Viewable radio button is set to Yes.
12. If desired, complete the Optional Announcement section to automatically post an announcement regarding the SafeAssignment.
13.
 Click the Submit button. The SafeAssignment is successfully created.
 - Creating a Weighted Grade Center Column
-
Purpose Statement:
After creating categories and assigning them to the Grade Center columns, it is time to create the weighted column. Every Blackboard Grade Center already includes a weighted column, so this document shows how to edit the existing weighted column. This document assumes the instructor is logged in to Blackboard and in a course.1. From the Control Panel, click Grade Center. The Grade Center menu displays.
2. From the Grade Center menu, click Full Grade Center. The Full Grade Center displays.

3. Hover the mouse over the Weighted Total column.
4. Click the drop-down arrow to access the Column menu. The Column menu displays.
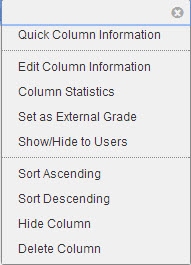
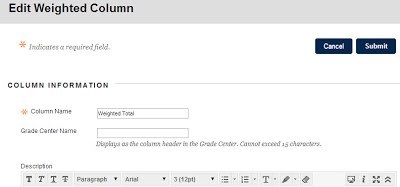
5. Click the Edit Column Information link. The Edit Weighted Column page displays.

6. From the Primary Display drop-down menu, click to select Score.
7. From the Secondary Display drop-down menu, click to select Percentage.
8. Scroll to the Select Columns section. This is where the weighting is set.
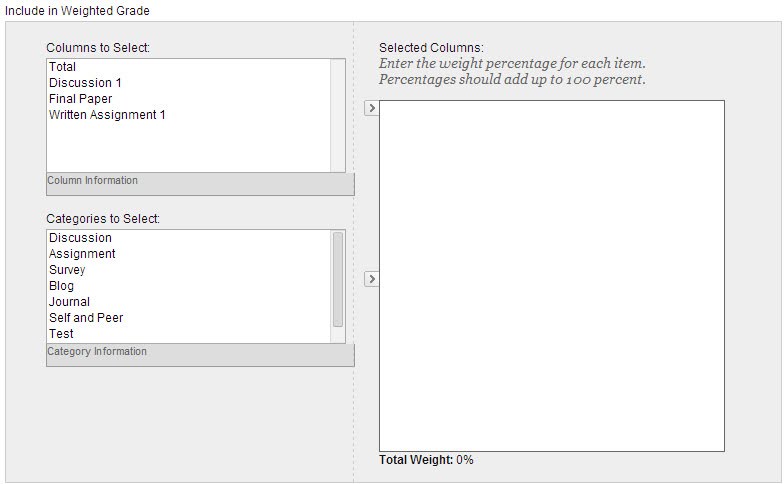
IMPORTANT NOTE: Weighted columns can be weighted by individual column or by category. The easiest way to weight grading is by category because it takes into account all columns with the category designation. For the purpose of this document, the process for weighting by category will be shown.
9. From the Categories to Select section, click to select the categories to be used.
10. Click the right-facing arrow to move the selected categories to the Selected Columns section. The selected categories display in the Selected Columns section.

11. For each selected category, in the % Category field, place the numeric value of the percentage. For this document, Assignments are 40%, Discussions are 35%, and the Final Paper is 25%.
IMPORTANT NOTE: All percentages entered must add up to 100%.
12. For each selected category, click to select either the Equally or Proportionally radio button. This tells Blackboard how to weight the column.
IMPORTANT NOTE: To apply equal value to all columns within a category, ensure that Equally is selected. To apply the appropriate value to a column based on its points compared to the other columns in the category, ensure that Proportionally is selected.
13. Click to select either the Drop Grades or Use only the radio buttons, depending on how you want the final grade weighted.
IMPORTANT NOTE: Drop Grades removes a number of either the highest or lowest grades for each category from the calculation. If you do not type numbers in the boxes, no grades are dropped. Use only the Lowest -OR- Highest Value to Calculate removes all grades from the calculation except for the best or worst score.
14. If the Total Weight is equal to 100%, click the Submit button. The weighted column is updated and will display the weighted grade to students.
For additional assistance on Grade Center columns, please visit the following site: Blackboard Grade Center Columns
- Creating Assignments
-
Purpose Statement:
This work instruction shows users how to create an assignment in Blackboard. Assignments are used for students to submit written assignments. This document assumes that the user is logged into Blackboard, inside of a course shell, and in a content area.1. Click the course you wish to edit. In this case it is Week 1.

2. Hover the mouse over the Assessments button.
The Assessments menu displays.
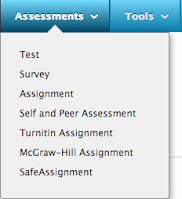
3. Click the Assignment link.
The Create Assignment screen displays.
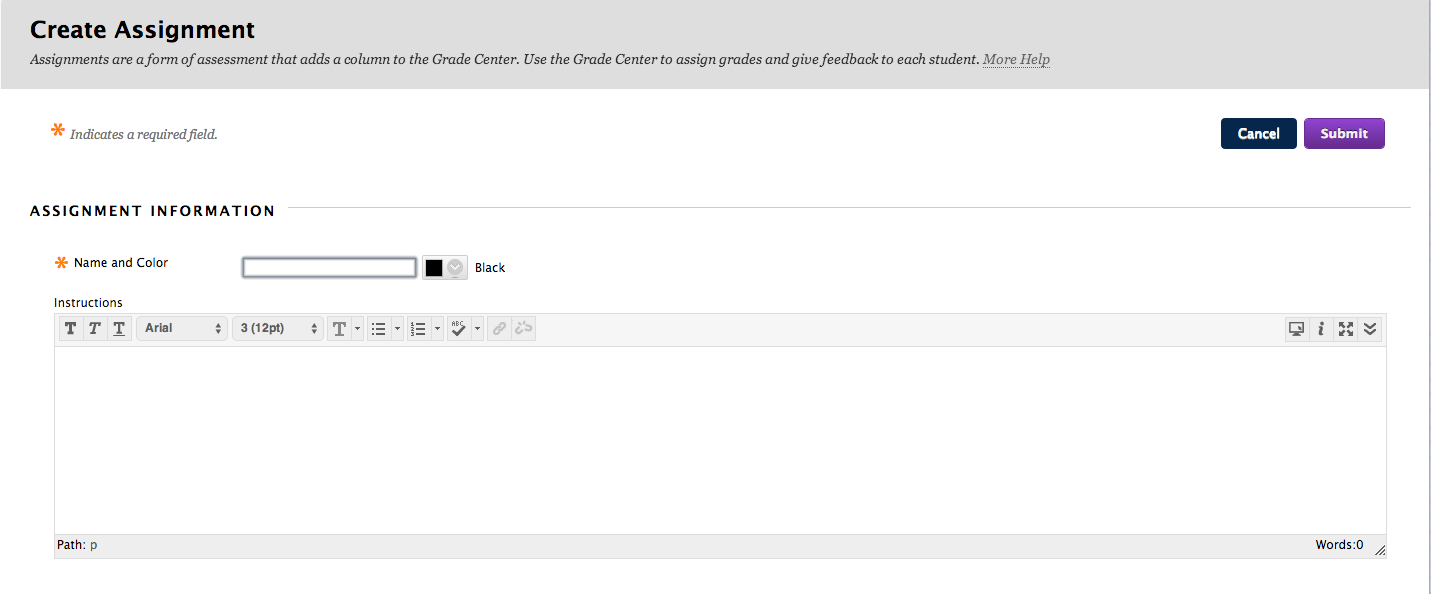
4. In the Name and Color field, enter a name for the item. This is a required field.- If desired, click the drop-down menu to modify the text color of the name.
5. In the Instructions field, enter the instructions for the item.
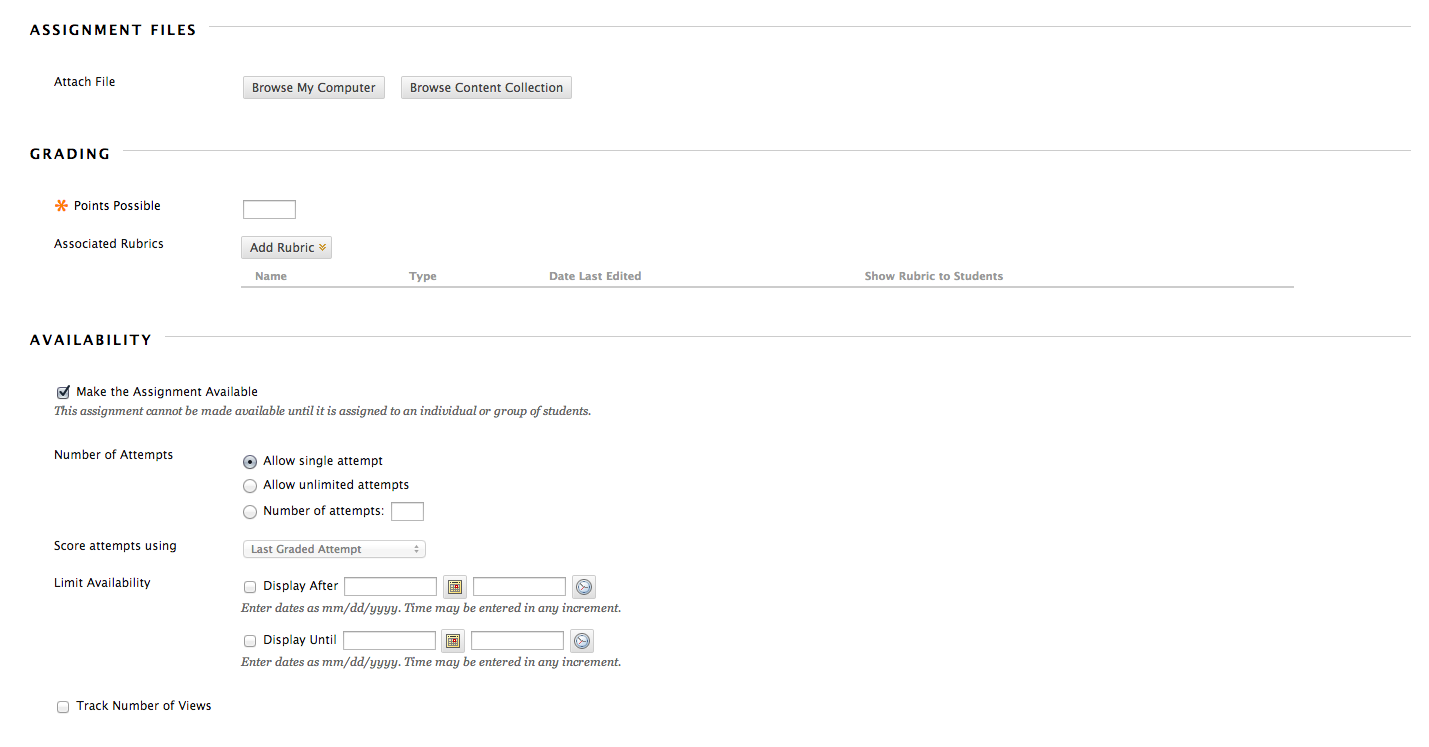
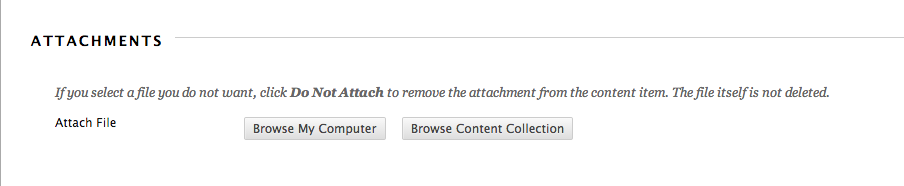
6. If desired, files can be attached to the assignment by clicking either the Browse My Computer or Browse Course buttons.7. In the Points Possible field, enter the number of points for the assignment. This is a required field.
8. If desired, modify the Number of Attempts by selecting the desired radio button.
9. If desired, modify the Limit Availability settings to set Display After and Display Until dates.
10. If desired, click to select the Track Number of Views to see how many times the assignment is accessed by students.
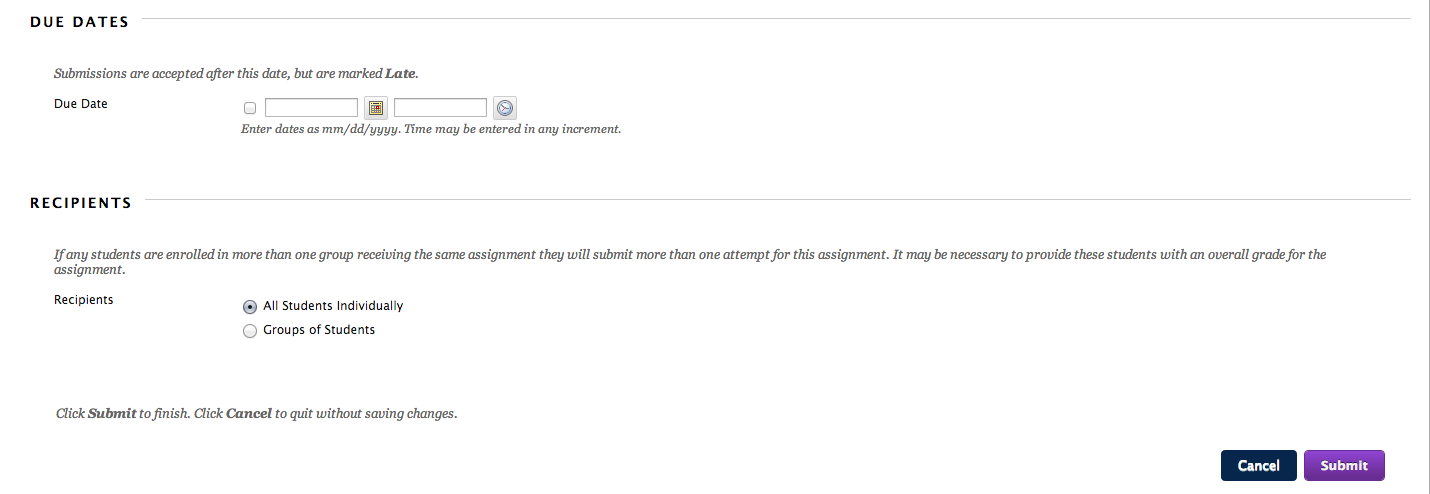
11. If desired, add a Due Date to the assignment.
12. If applicable, modify the Recipients section if the assignment is designed for group submission.
13. Click the Submit button.
 The assignment displays at the bottom of the content area.
 - Creating Hyperlinks
-
Purpose Statement:
This work instruction shows users how to create links to external websites in Blackboard. Creating links, or URLs, is another way to bring additional material and perspective to each week’s content. This document assumes that the user is logged into Blackboard and inside of a course shell.1. Click the course you wish to edit. In this case it is Week 1.

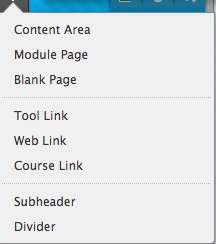
2. Hover the mouse over the Build Content button.
The Build Content menu displays.
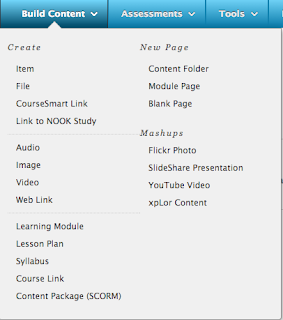
3. From the second section of the Create column, click the Web Link link.The Create Web Link page displays.
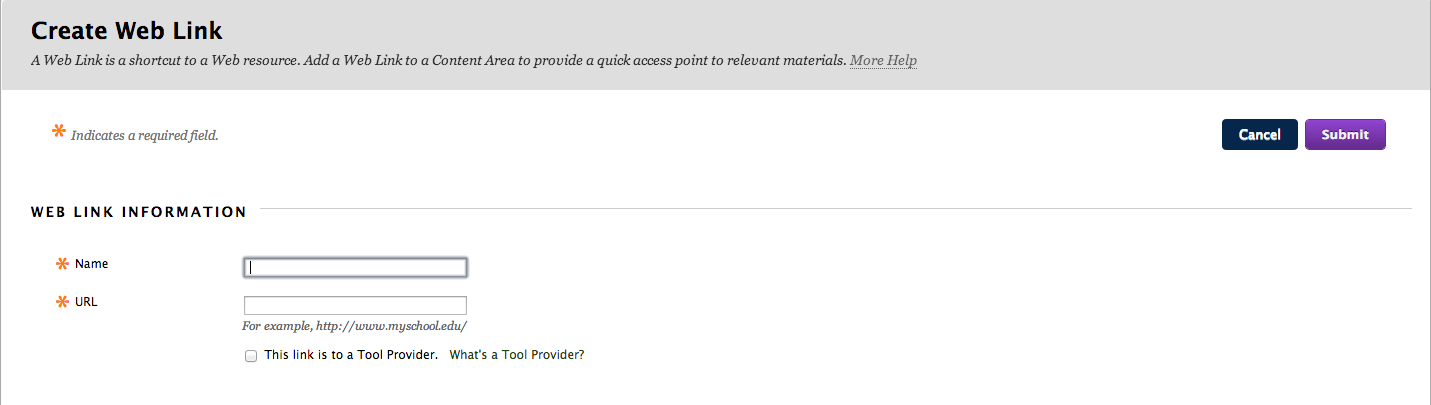
4. In the Name field, enter a name for the link. This is a required field.
5. In the URL field, paste or enter the website address for the site to which the link is being created.
IMPORTANT NOTES:
- If desired, enter a description of the website in the Attachments section.
- If desired, attach a file to the URL content item by clicking the Browse My Computer button in the Attachments section.

6. From the Web Link Options section, click to select the Yes radio button for the Open in New Window option. Selecting this option will ensure that the link opens properly.
IMPORTANT NOTES:
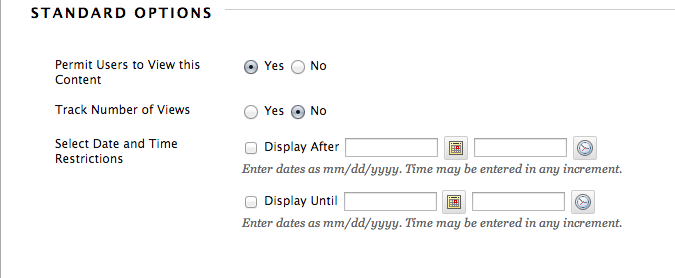
- Ensure that the Permit Users to View this Content radio button is set to Yes if you want student to have the ability to view the URL. Otherwise, select No.
- To track the number of times the URL content item is used, click to select the Yes radio button for the Track Number of Views option.
- Use the Select Date and Time Restrictions options to make the URL content item available and unavailable on the dates and times specified.
7.
 Click the Submit button. The URL content item is successfully created.
 - Creating New Content Areas
-
Purpose Statement:
This work instruction shows users how to create content areas in Blackboard. Content Areas are used to store items, assignments, links, and other types of Blackboard content. This document assumes that the user is logged into Blackboard and inside of a course shell.1. From the left-hand navigation menu, hover the mouse over the Add Menu Item button.
The Add Menu Item menu displays.

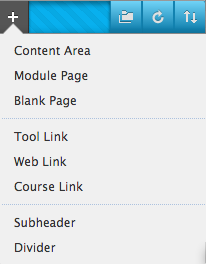
2. From the Add Menu Item menu, click the Content Area link.
The Add Content Area window displays.
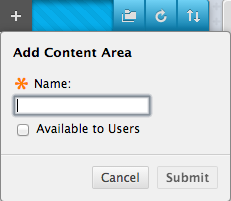
3. In the Name field, enter a name for the new content area.
4. Click to select the Available to Users checkbox.
NOTE: If you are creating a content area that students should not see, do not select this checkbox.
5. Click the Submit button. The new content area displays at the bottom of the left-hand navigation menu.
- Creating New Content Items
-
Purpose Statement:
This work instruction shows users how to create items within content areas in Blackboard. Items are used to convey information to students. This document assumes that the user is logged into Blackboard, inside of a course shell, and in a content area.1. Hover the mouse over the Build Content button.
2. The Build Content menu displays.

3. Click the Item link.4. The Create Item screen displays.
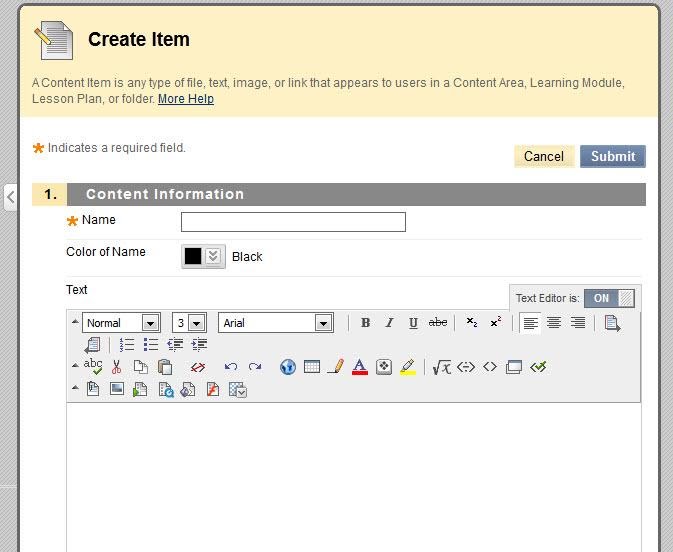
5. In the Name field, enter a name for the item. This is a required field.6. If desired, click the Color of Name drop-down menu to modify the text color of the name.
7. In the Text field, enter the text for the item.
8. Click the Submit button. The Item displays in the content area.
- Creating Tool Links
-
Purpose Statement:
This work instruction shows users how to create tool links in Blackboard. Tool links are used to provide access to key tools, such as Journals, Blogs, and Wikis. This document assumes that the user is logged into Blackboard, inside of a course shell, and in a content area.1.
 From the left-hand navigation menu, hover the mouse over the Add Menu Item button.
 The Add Menu Item menu displays.

2. From the Add Menu Item menu, click the Tool Link link.
The Add Tool Link window displays.
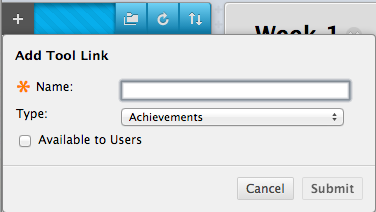
3. In the Name field, enter a name for the new tool link.4. From the Type drop-down menu, select the tool to which the link should be created. In this example, a Tool Link to Announcements is being created.
5. Click to select the Available to Users checkbox.
NOTE: If you are creating a content area that students should not see, do not select this checkbox.6.
 Click the Submit button. The new tool link displays at the bottom of the left-hand navigation menu.
 - Creating Turnitin Assignments
-
Purpose Statement:
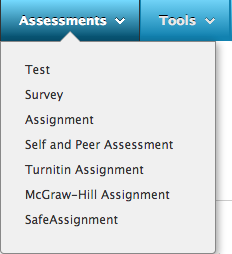
The purpose of this procedural document is to provide detailed instructions on how to create a Turnitin assignment. This procedural document assumes that users are in a course and ready to create the Turnitin assignment.1. Hover the mouse over the Assessments button.
The Assessments menu displays.

2. From the Assessments menu, click the Turnitin Assignment link.IMPORTANT NOTE: If the Turnitin System Requirements Compatibility Check page displays make the necessary changes to the browser to ensure Turnitin runs properly and then click the Continue to Dashboard button.
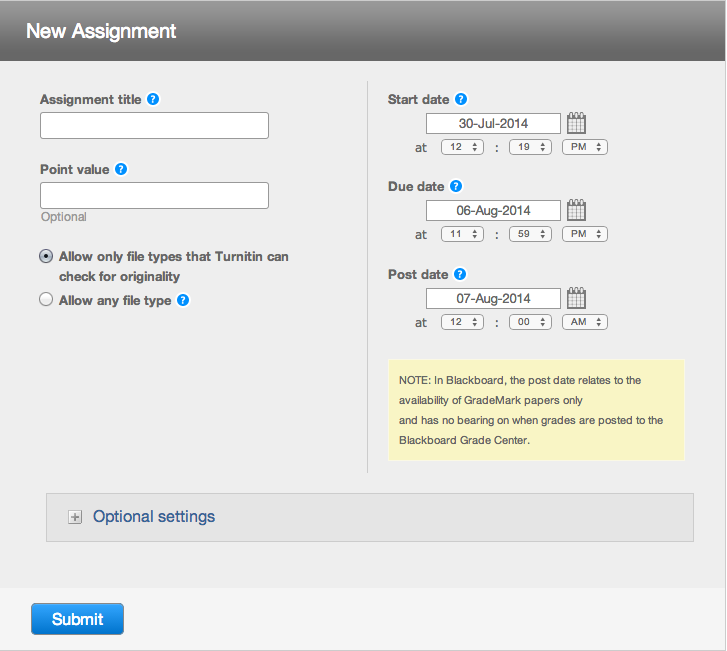
-In the New Assignment section, provide a title for the assignment in the Assignment Title textbox and enter a numerical score in the Point value textbox.
-In the New Assignment section, provide a Start date, Due date, and Post date for the assignment.

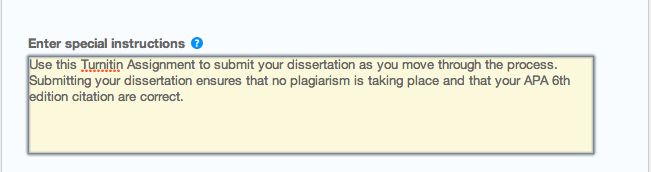
1. Click to expand the Optional Settings menu for the Turnitin assignment.
2. In the Enter special instructions text area, enter detailed instructions on how students are to use the Turnitin assignment.

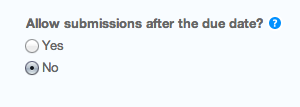
3. For the Allow submissions after the due date option, click to select the Yes radio button.

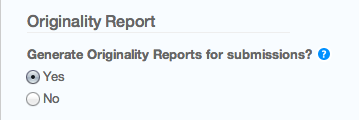
4. For the Generate Originality Reports for submissions option, click to select the Yes radio button.
5. From the Generate Originality Reports for student submissions drop-down menu, click to select the immediately (can overwrite reports until due date) option.
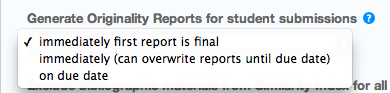
This setting allows students to submit multiple times to the same Turnitin assignment.
6. For the Exclude bibliographic materials from Similarity index for all papers in this assignment option, click to select the Yes radio button.

This setting will ensure that matches in the References section will not be displayed on the Originality Report.
7. For the Exclude quoted materials from Similarity index for all papers in this assignment option, click to select the No radio button.

This setting will ensure that matching quotes are returned. This serves to help students learn to better directly cite sources.
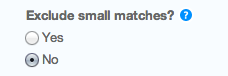
8. For the Exclude small matches option, click to select the No radio button.

This setting will ensure that minimal matches are not displayed on the Originality Report.
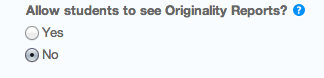
9. For the Allow students to see Originality Report option, click to select the Yes radio button.
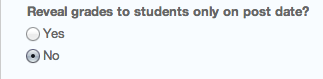
10. For the Reveal grades to students only on post date option, click to select the No radio button.

This ensures that students will see their grades when the assignment is graded.
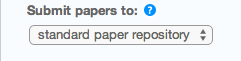
11. For the Submit papers to option, ensure that standard paper repository is selected.

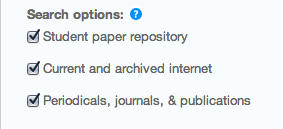
12. For the Search options option, ensure that all three checkboxes are selected.
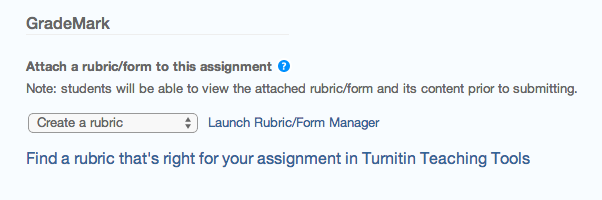
13. Do not change any settings in the Grade Mark section.

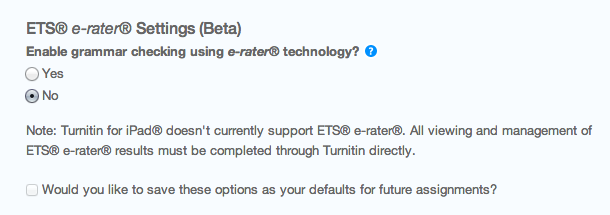
14. Do not change any settings in the e-rater Grammar Check settings (Beta) section.
15. Scroll to the top of the Turnitin assignment.
16.
 Click the Submit button to create the Turnitin Assignment.
- Creating Narrated PowerPoint Presentations
-
Purpose Statement:
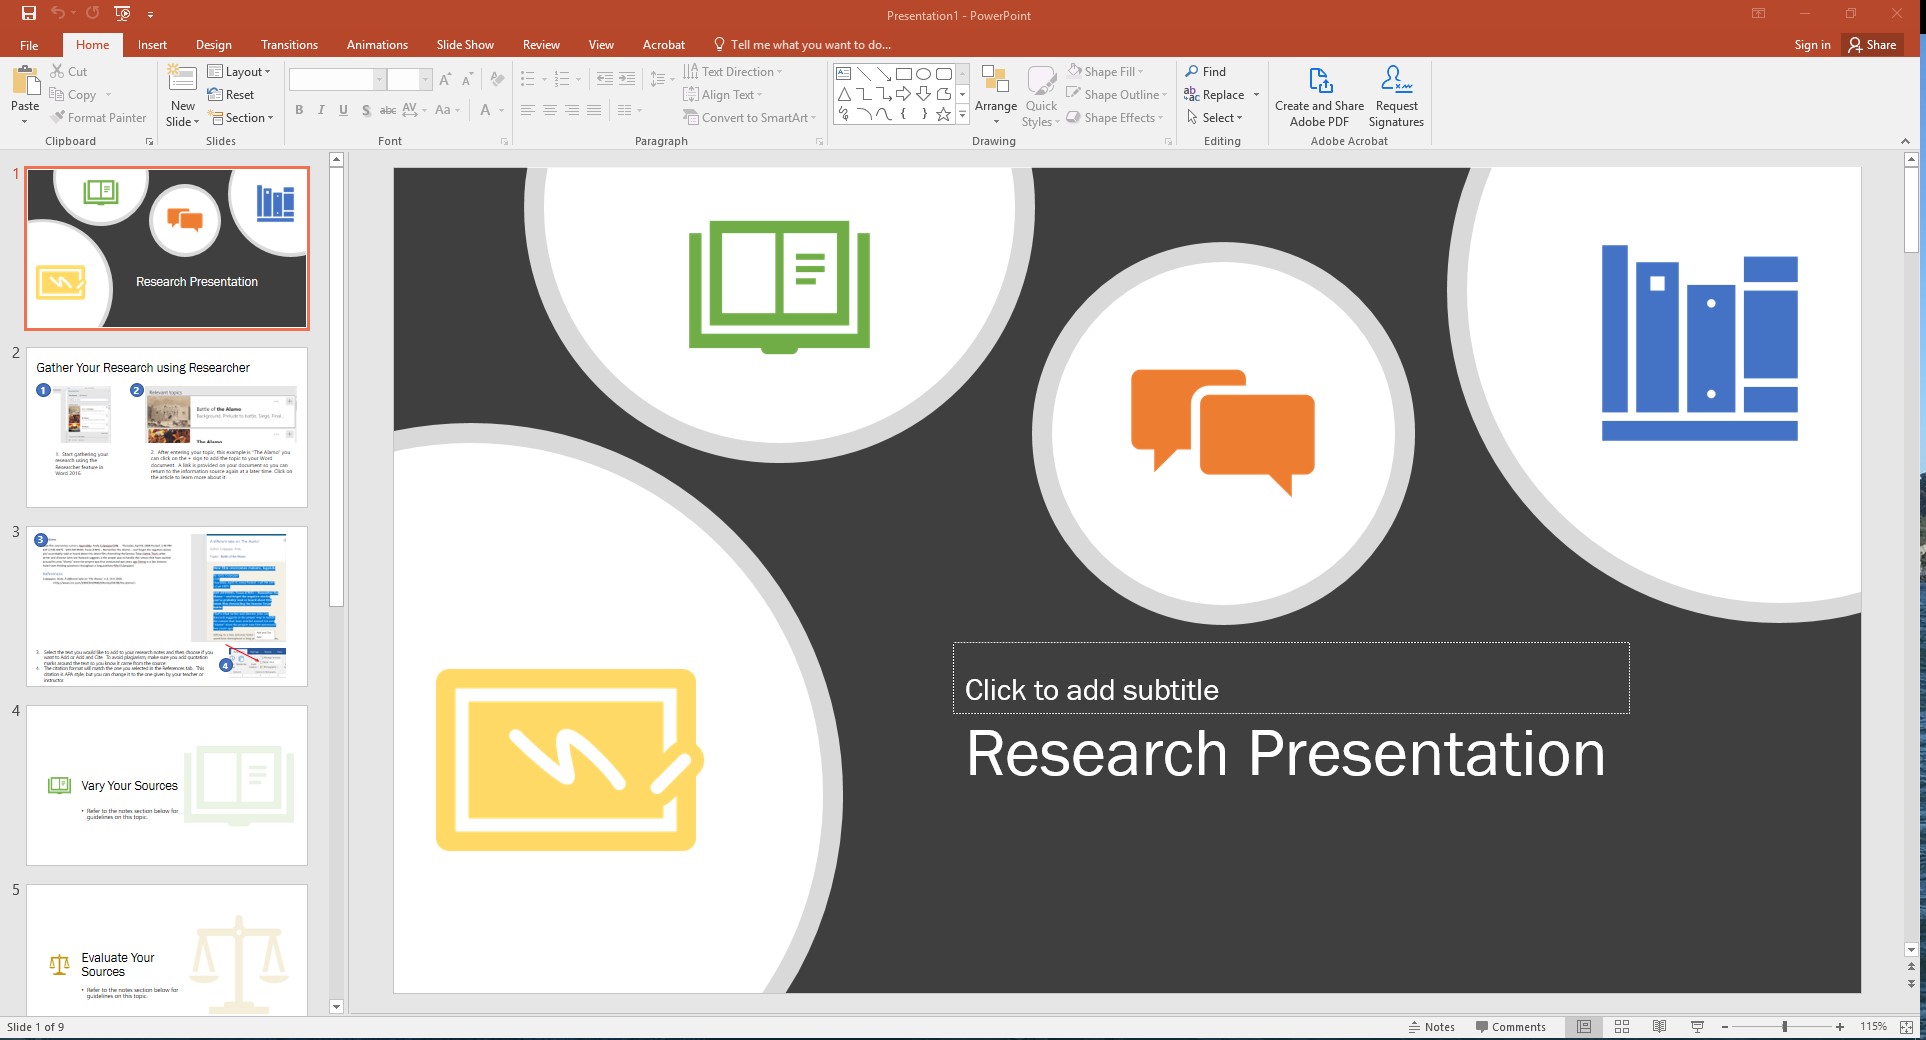
The purpose of this demonstration is to show users how to create narrated presentations in PowerPoint and export to video for upload to YouTube.Open your PowerPoint presentation and select the first slide you would like to record audio for.
Select the Insert tab to display the Audio recording tool.

Click the Audio tool, then select Record Audio.
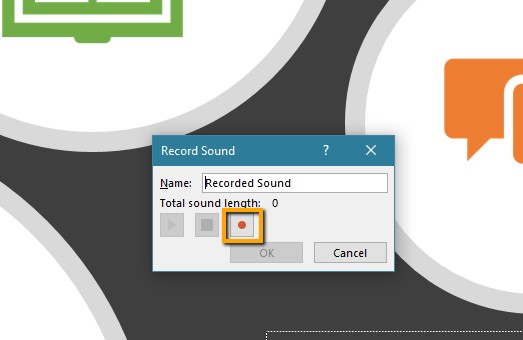
The Record Sound menu will display in the center of the slide.
To begin your audio recording, select the red record button:
While your recording is in progress, the length of the recording will display.
You may also click the stop button if needed or cancel to start over.
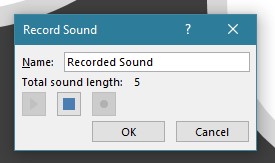
When you are finished recording, click OK.
The speaker icon will display to indicate audio has been added to the slide.

To listen to your recording, click to highlight the speaker icon and the play button will display.

Note: If you need to re-record your audio, highlight the speaker icon, and tap the Delete key on your keyboard.
Then, follow the previous steps to add a new recording.
Next, you will need to set options for the audio to play during the presentation.
- Select the speaker icon, (as shown in the image above).
- The Audio Tools option should now appear on the upper menu bar.
- Select Playback from the Audio Tools menu.
- Change the Start option from On Click to Automatically.
- Check the Hide During Show box.
Repeat the above steps to record audio for each slide in your presentation. Each slide must be recorded individually.
When you have finished recording audio for the entire presentation, it will then need to be saved as a video file.
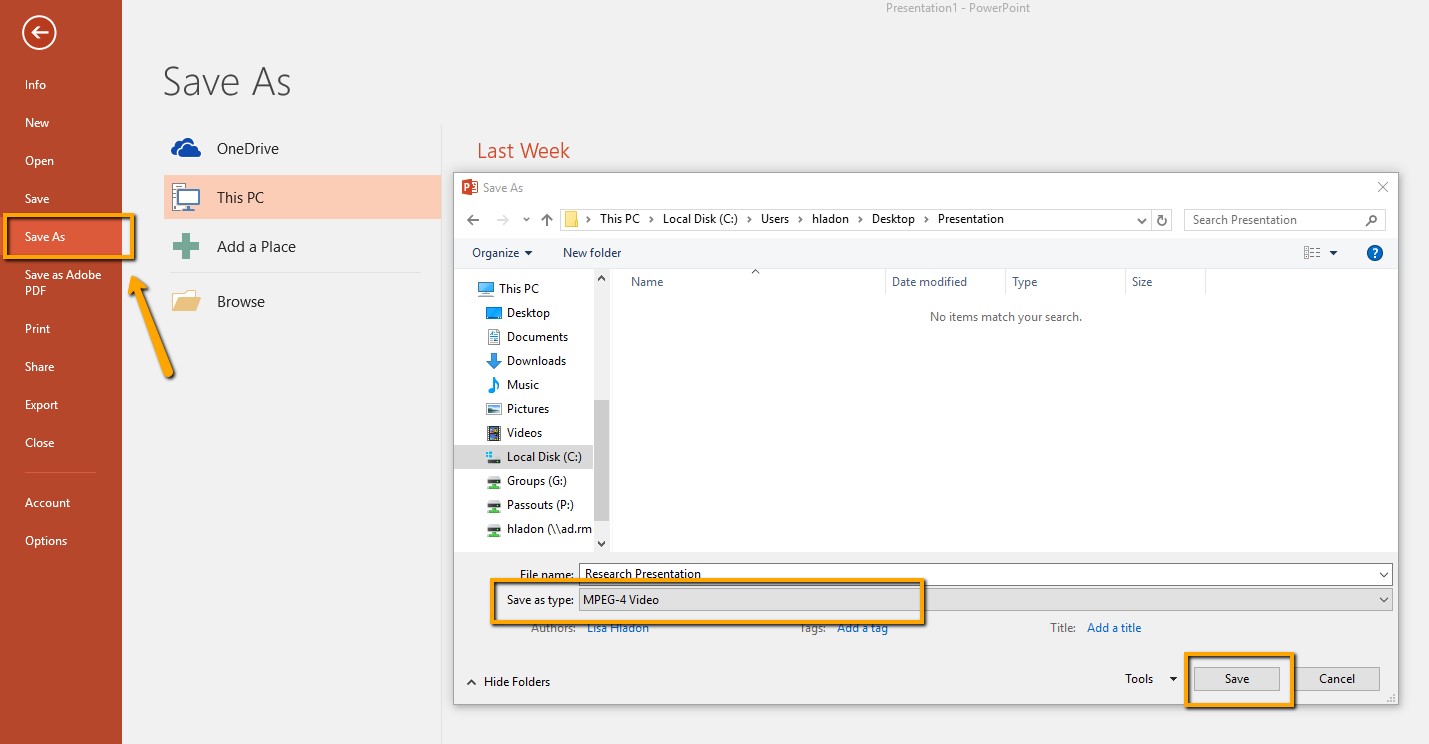
To convert your presentation to video:
- Select Save As.
- Select where you would like to save your file (ex: desktop).
- From the Save as Type menu, select MPEG-4 Video.
- Click Save.
Your presentation will now be converted to a video file. A progress bar will display in the lower middle of your
screen as the file is being converted and saved:
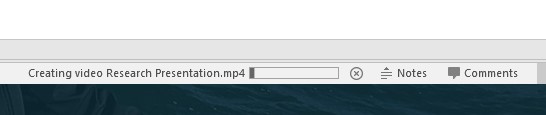
Note: if you are saving a larger presentation, this step can take some time.
After your file has been created, it will appear as a video where you have saved it.
You can now view your presentation video.
Your video can now be uploaded to YouTube to make sharing even easier.
Uploading a Video to YouTube

Open www.youtube.com in your browser.
Login using your RMU account.
Note: All RMU users have access to a YouTube account.
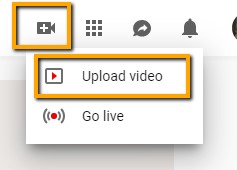
Select the Upload Icon and select Upload Video.
Next, select the privacy option you would prefer for your video.
Note: Public or Unlisted are recommended settings.

Click the gray arrow to select the video file from your computer or simply drag and drop the file to begin uploading.
The progress screen will display as your file is uploaded.
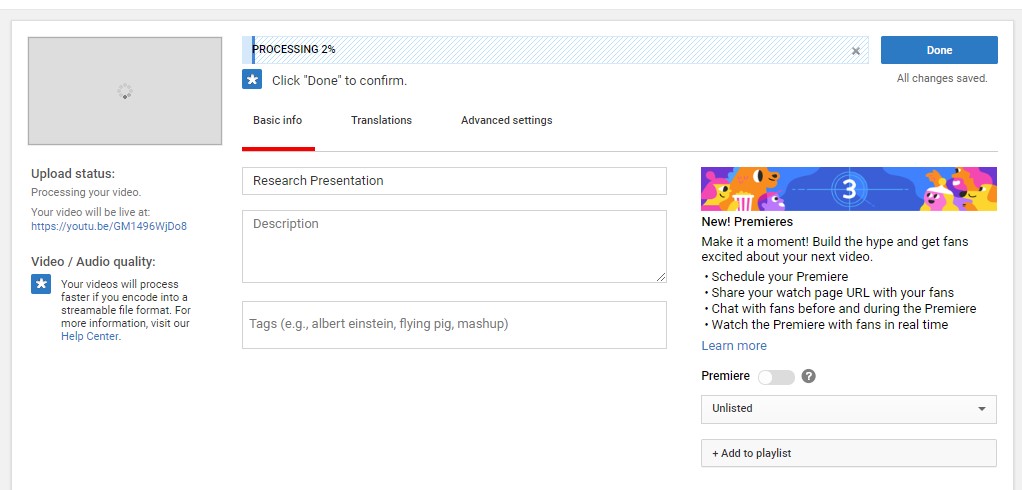
When the processing is complete, select Done.
Next, a link will be generated for your video.
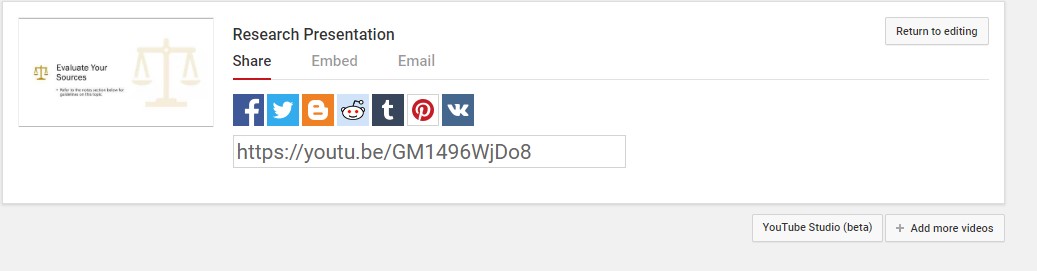
You can now share your video presentation using the link, embed the video, or share it via email or social media.
- Creating Your Blackboard Profile
-
Purpose Statement:
The purpose of this document is to provide students and faculty with step-by-step instructions on how to create and edit a profile in Blackboard. This profile shows key information about the student and faculty and an image. This helps create a sense of personalization in an online environment.
If you only wish to edit your Blackboard profile, proceed to Step 13.
This procedural document assumes that users are logged in to Blackboard.1. In the upper-right corner of the screen, click the Global Navigation drop-down menu.
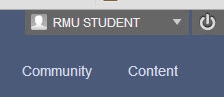
The Global Navigation drop-down menu displays.
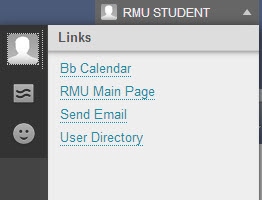
2. Click the Edit My Blackboard Profile button. This button is denoted by the Grey head/profile picture in the upper-left corner of the Global Navigation menu. If you are editing your profile, please skip to Step 13, otherwise, follow the remainder of the steps.
IMPORTANT NOTE: If you are creating your profile, the image will be a grey head. If you are editing your profile, the image will be the image you selected for your profile.
The Blackboard Social End User Terms of Service screen displays.
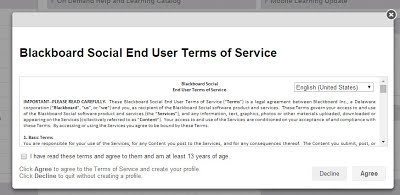
3. Click to select the I have read these terms and agree to them and am at least 13 years of age checkbox.
4. Click the Agree button.
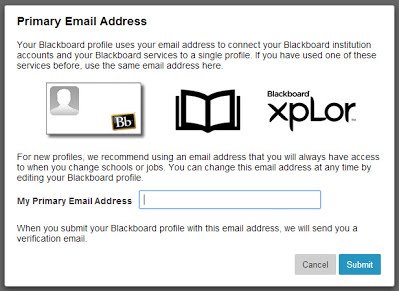
The Primary Email Address screen displays.

5. In the My Primary Email Address field, enter your RMU email address.
IMPORTANT NOTE: You can only use your RMU email address. You cannot use any other email address.
6. Click the Submit button.
The Blackboard + myEdu screen displays.
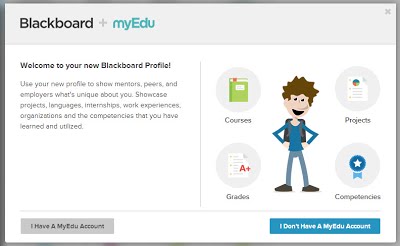
7. Click the I Don't Have A MyEdu Account button.
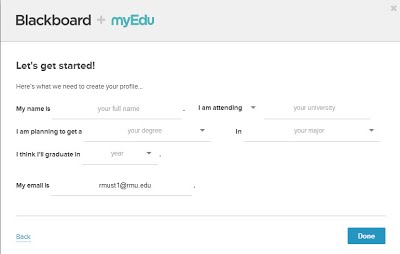
The Let's Get Started page displays.

8. Fill out the form in its entirety.
9. When the form is completed, click the Done button.
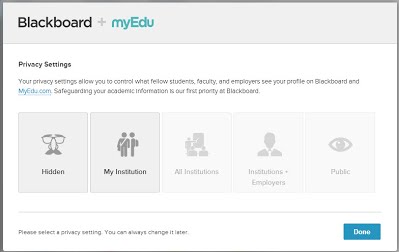
The Privacy Settings screen displays.

10. Click the My Institution button. This share your profile with just those at RMU.
11. Click the Done button.
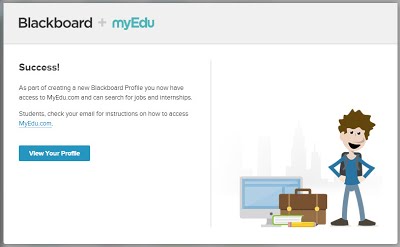
The Success! screen displays.

12. Click the View Your Profile button. The Blackboard home page displays.
13. Click the Global Navigation drop-down menu. The Global Navigation drop-down menu displays.
14. Click the Edit My Blackboard Profile button. This button is denoted by the Grey head/profile picture in the upper-left corner of the Global Navigation menu.
Your Blackboard profile displays.
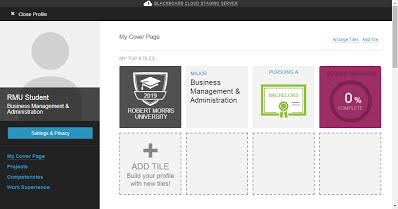
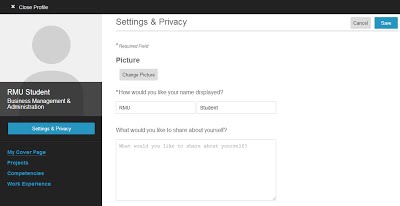
15. To edit your profile picture and add additional information to your profile, click the Settings & Privacy button.
The Settings & Privacy screen displays.

16. To update your profile picture, click the Change Picture button.
17. If desired, in the How would you like your name displayed? field, modify the way your name displays in your profile.
IMPORTANT NOTE: This only affects your profile, not how your name is displayed in your courses.
18. To add additional information to your profile, enter text in the What would you like to share about yourself? text area.
19. After all changes have been made, click the Save button.
- Exporting a Test From Blackboard
-
Purpose Statement:
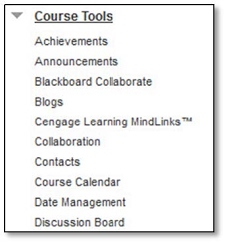
Exporting a test from one Blackboard course to another is a simple task, but one that many instructors will find helpful. This procedural document assumes that you are logged in to Blackboard and in the course from which the test will be exported.1. From the Control Panel, click Course Tools.
The Course Tools menu displays:
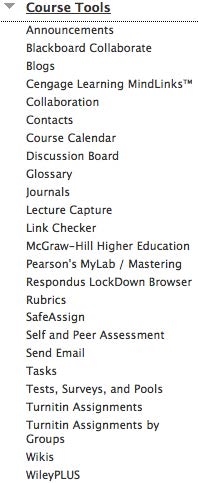
2. From the Course Tools menu, click Tests, Surveys, and Pools.
The Tests, Surveys, and Pools page displays:
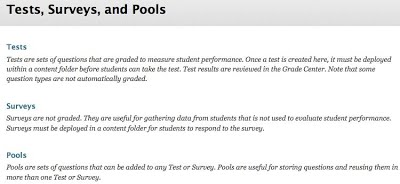
3. From the Tests, Surveys, and Pools page, click Tests.
The Tests page displays:
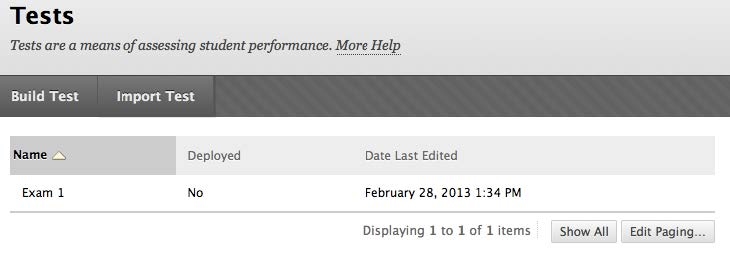
4. Hover over the test to be exported and click the drop-down arrow.
The Test Options menu displays:
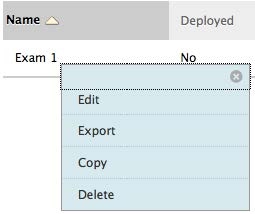
5. From the Test Options menu, click Export.
The Save Test Export window displays:
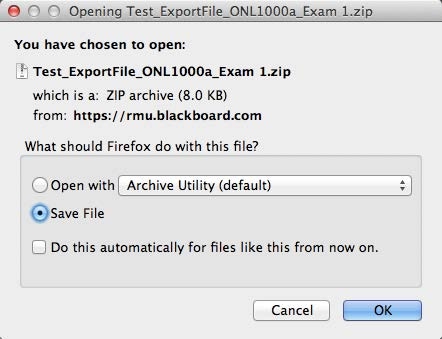
6. Ensure that the Save File option is selected and then click the OK button. The test is saved as a .zip file on your computer in the specified location. This is typically the Downloads folder. This .zip file is what is imported into other Blackboard courses.
- Grading
-
- Grading Assignments
- Purpose Statement:
The purpose of this document is to walk the viewer through the process of grading a written assignment submitted in Blackboard.
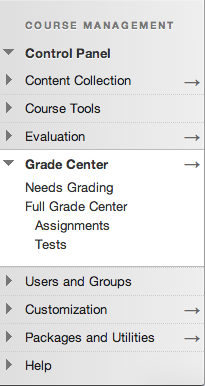
1. The first step is to access the Grade Center. Starting at the Home Page from within the course, Access the Grade Center tab from the Course Management Control Panel. This is located just below the main course menu on the left hand side of the screen. Click on “Full Grade Center” in order to enter.

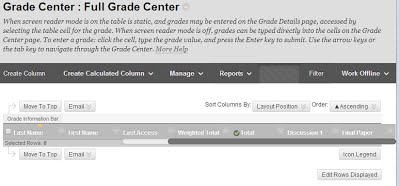
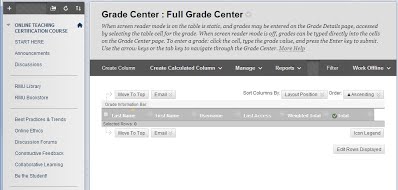
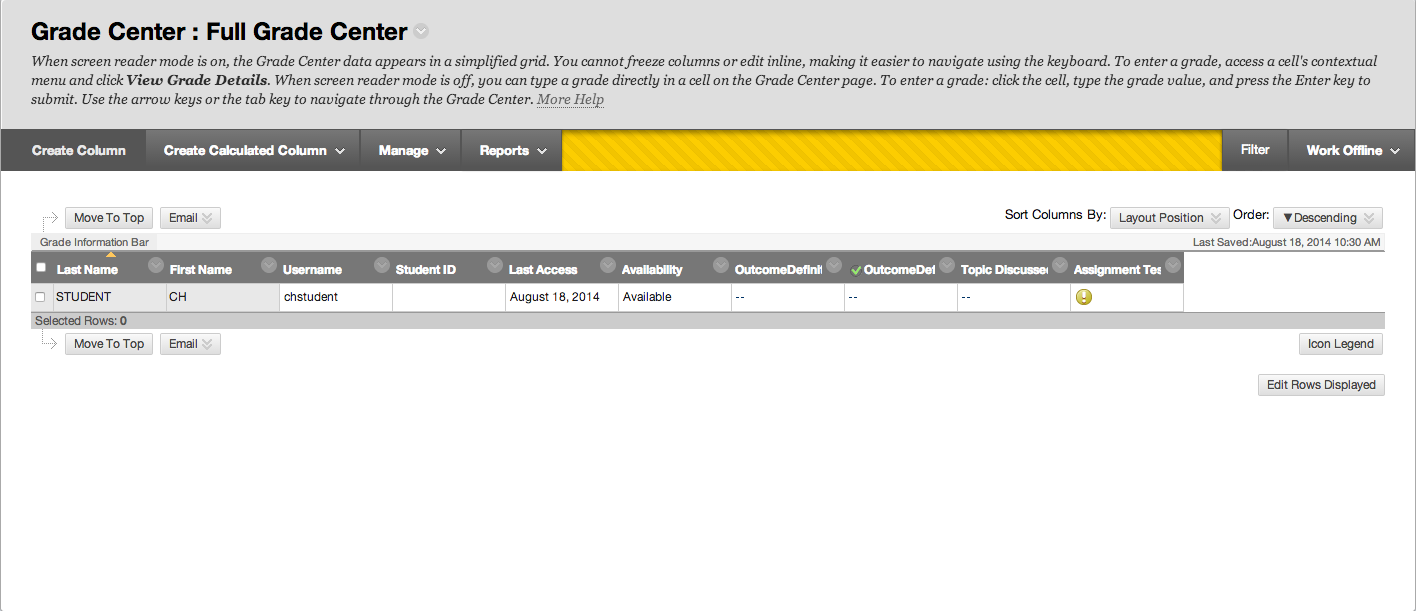
2. The following picture represents a view of the grade center.
 This Yellow Exclamation Symbol informs the instructor that there is an item in this assignment that requires grading.
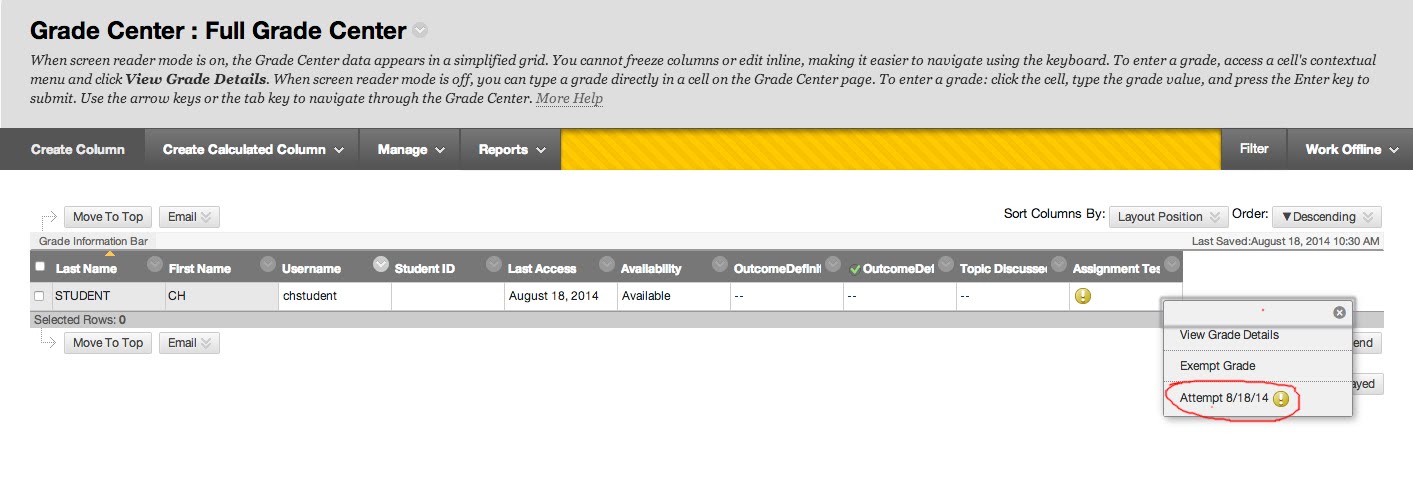
3. When you Mouse Over, or place your mouse in the cell with the
, and small icon appears on the right side of the cell. This is called a Chevron, and it will activate a menu as shown below:
4. In order to begin grading the attempt, simply click on the item labeled “Attempt 8/18/14
”.
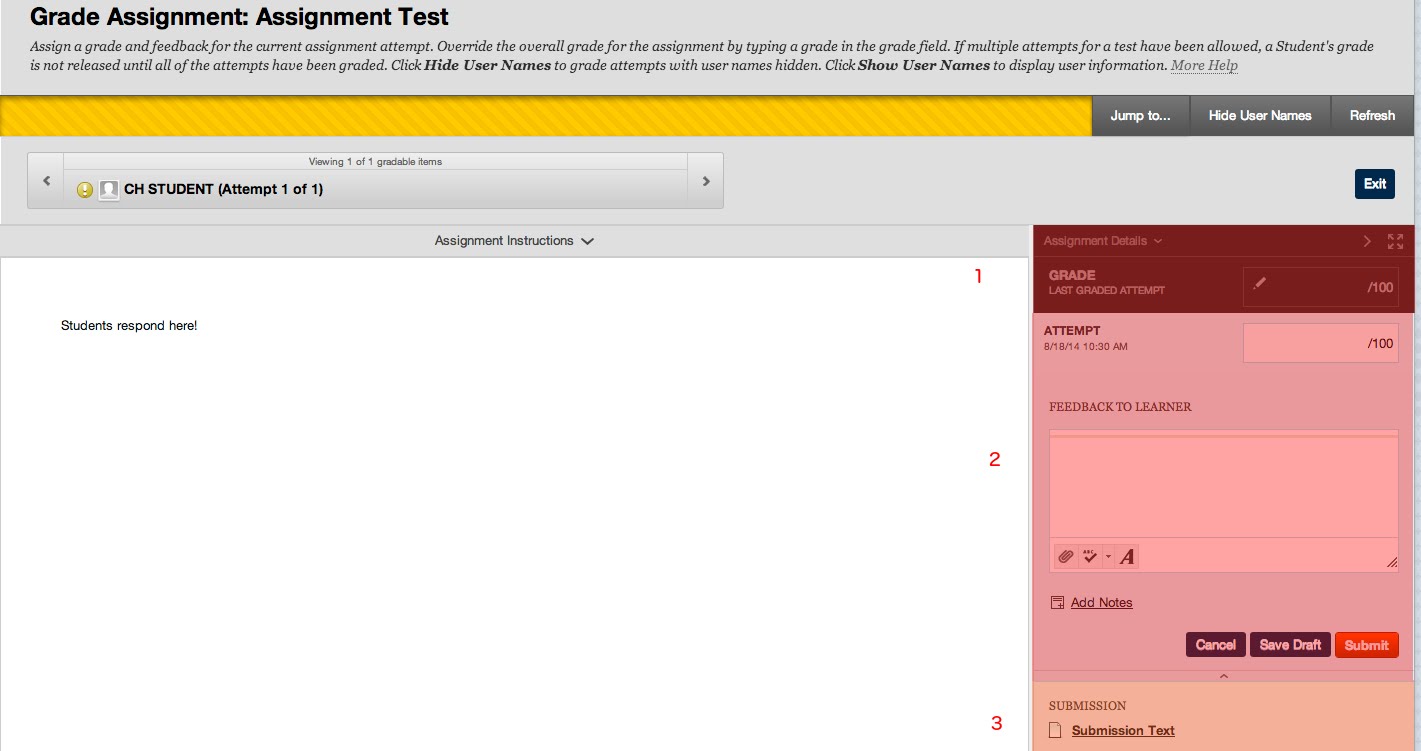
5. Once you have opened the grading window shown below, you will find (3) key areas for grading:
1. The Scoring Box (1) is the actual area to enter the final numeric score for the assignment.
2. The Attempt Box (2) is where you can put temporary grades for the assignment. The Feedback box can found once the Attempt Box is selected.
3. The Submission Box (3) is the actual name of the file that was uploaded.
6. FINALLY, NEVER FORGET TO HIT THE SUBMIT BUTTON! This is saving your work, and if you leave the page, your work will be lost!
- Grading Discussion Forums
- Purpose Statement:
The purpose of this document is to walk the viewer through the process of grading a written assignment submitted in Blackboard.
1. The first step is to access the Grade Center. Starting at the Home Page from within the course, Access the Grade Center tab from the Course Management Control Panel. This is located just below the main course menu on the left hand side of the screen. Click on “Full Grade Center” in order to enter.

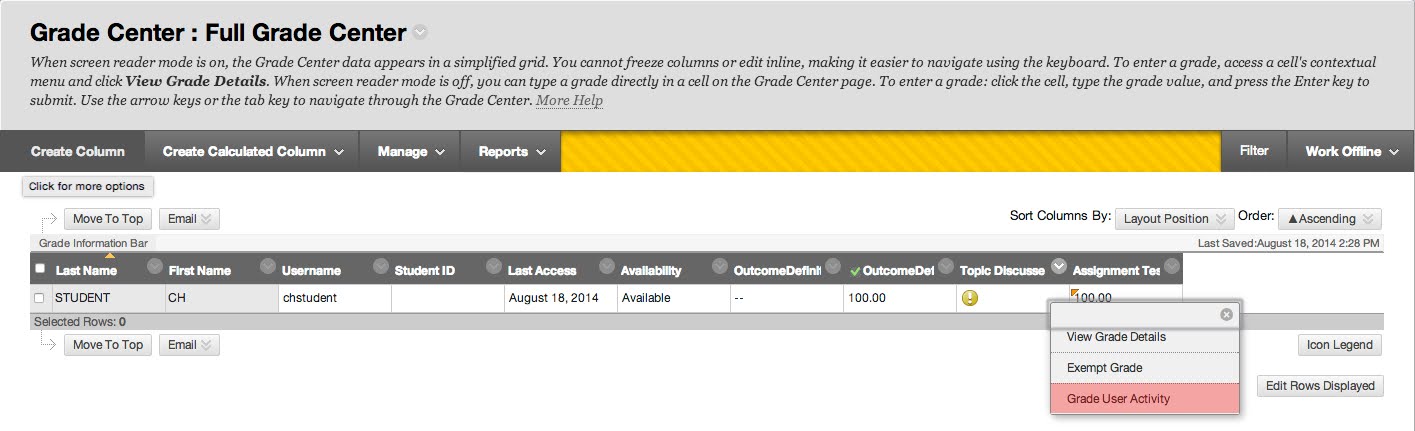
2. The following picture represents a view of the grade center.
 This Yellow Exclamation Symbol informs the instructor that there is an item in this assignment that requires grading.
3. When you mouse over, or place your mouse in the cell with the
, and small icon appears on the right side of the cell. This is called a Chevron, and it will activate a menu as shown below:
4. In order to begin grading the discussion, simply click on the item labeled “Grade User Activity”.

5. Once you have opened the Grade User Activity shown below, you will find (2) key areas:1. Area (blue) is a grading area for the users activity in the discussion.
2. Area (red) actually contains a copy of all time and dated posting activity by the student. This
makes it handy see and assess the activity.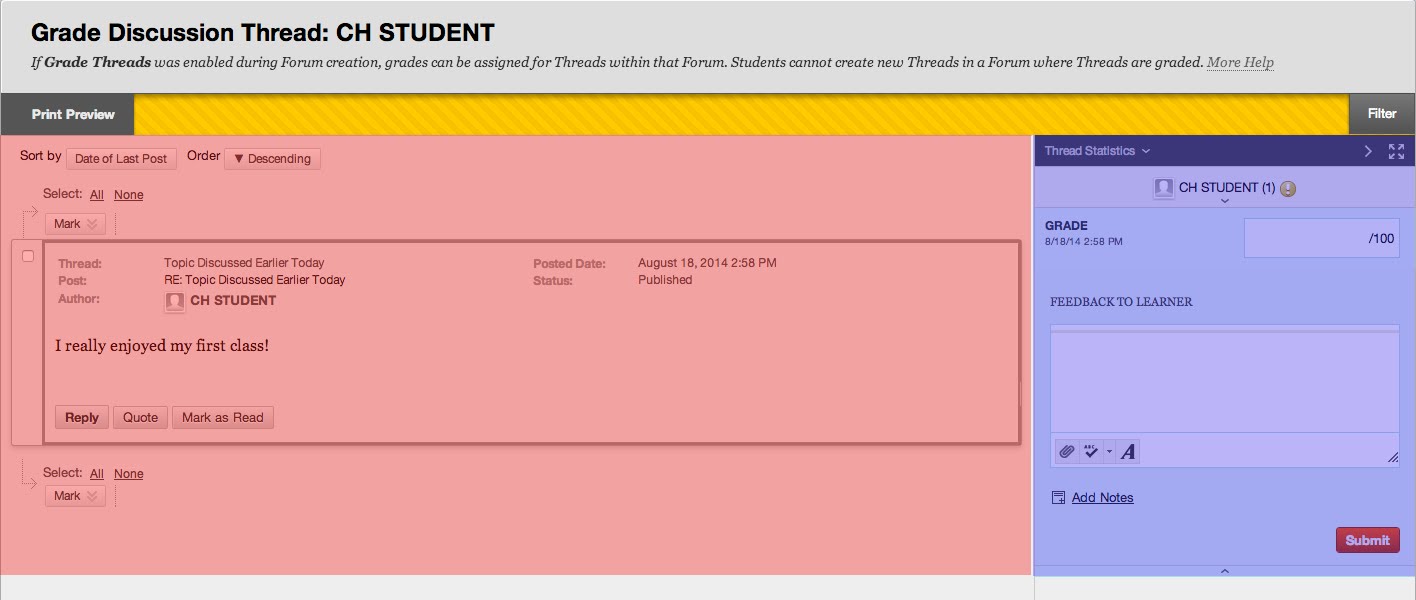
6. Once ready to grade follow the following instructions:
1. Area (red) allows you to enter a numerical grade by simply clicking inside the box.
2. Area (blue) allows you to enter written feedback on performance.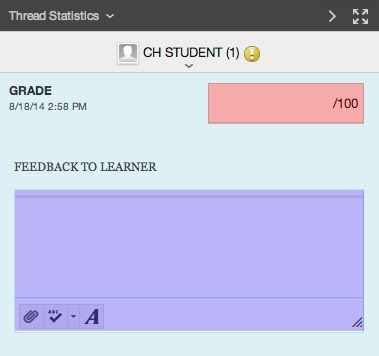
7. DON'T FORGET TO HIT "SUBMIT".

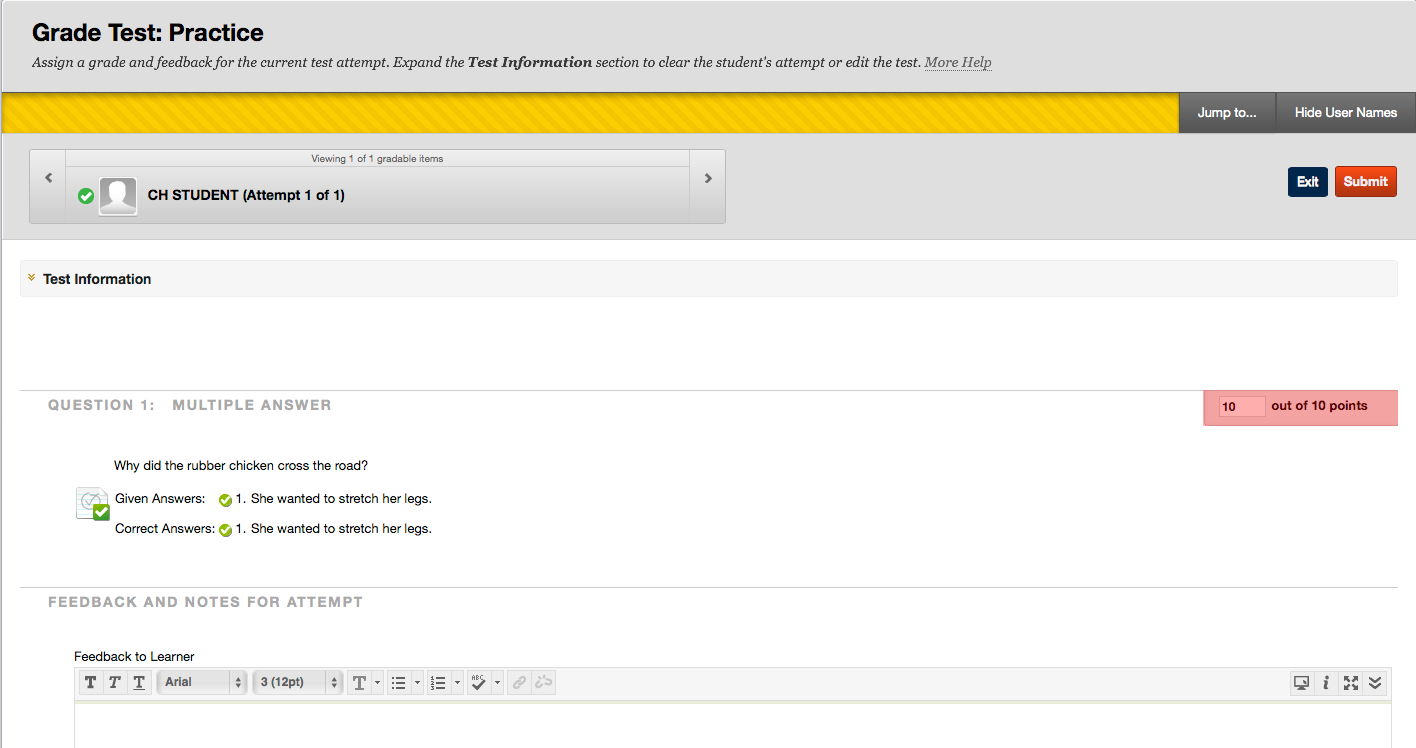
- Grading Tests
- Purpose Statement:
The purpose of this document is to walk the viewer through the process of grading a Test or Quiz in Blackboard.
1. The first step is to access the Grade Center. Starting at the Home Page from within the course, Access the Grade Center tab from the Course Management Control Panel. This is located just below the main course menu on the left hand side of the screen. Click on “Full Grade Center” in order to enter.

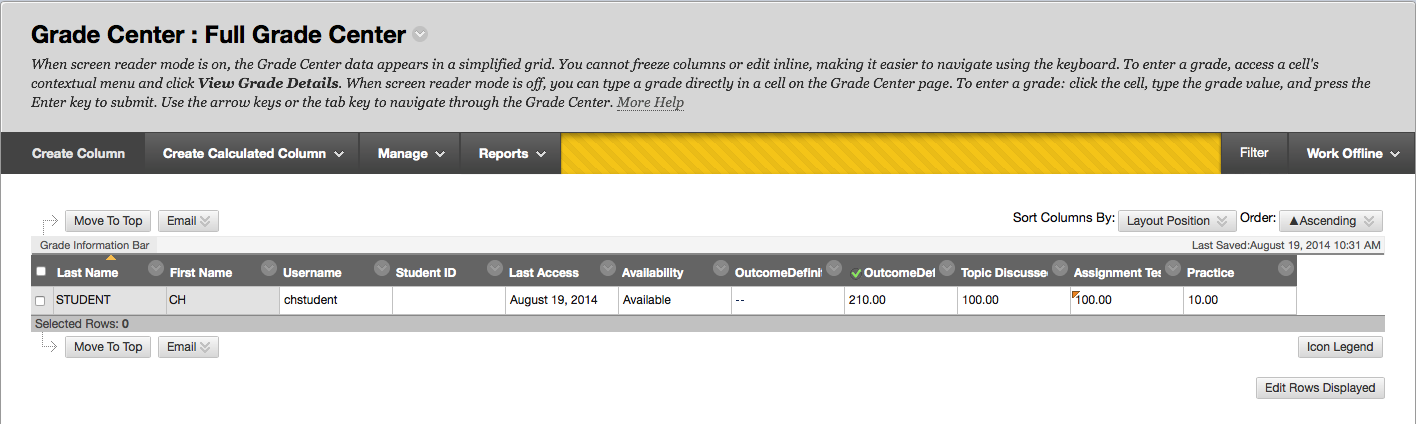
2. The following picture represents a view of the grade center.
 This Yellow Exclamation Symbol informs the instructor that there is an item in this assignment that requires grading.
3. When you Mouse Over, or place your mouse in the cell with the
and small icon appears on the right side of the cell. This is called a Chevron, and it will activate a menu as shown below: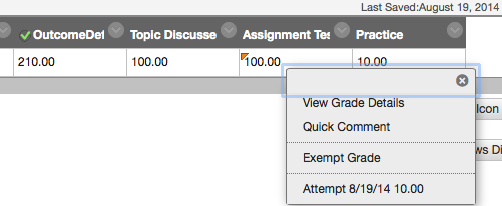
4. In order to begin grading the discussion, simply click on the item labeled “Attempt 8/19/14".
5. Once you have opened the “Attempt 8/19/14” shown below, you will find a list of test questions:
1. Objective questions will be scored by the computer.
2. Short Answer and Essay Questions require the instructor to grade.
6. In order to actually grade the a short answer or essay question, the instructor must:
1. Simply click in the points box to assignment a point grade.
2. A feedback text box is open for detailed feedback if necessary. This can be left blank, and it is at the sole discretion of the instructor to use.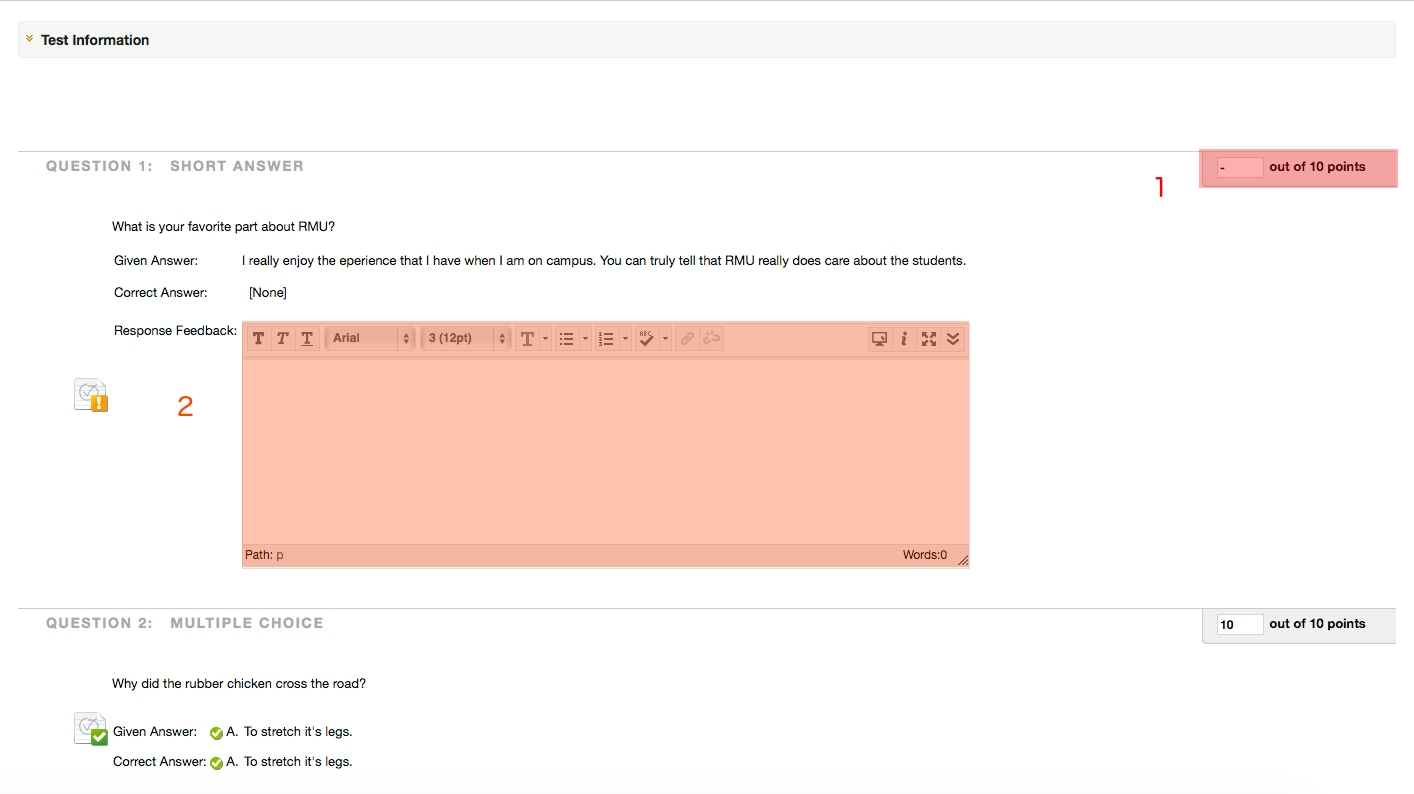
7. Once you have completed you grading, please remember to hit the SUBMIT button to preserve your work.
 - Grading Turnitin Assignments
-
Purpose Statement:
The purpose of this document is to guide an instructor through the process of grading a Turnitin assignment submitted in Blackboard.Open the Grade Center in your Blackboard course shell.
Locate the column for your Turnitin assignment.
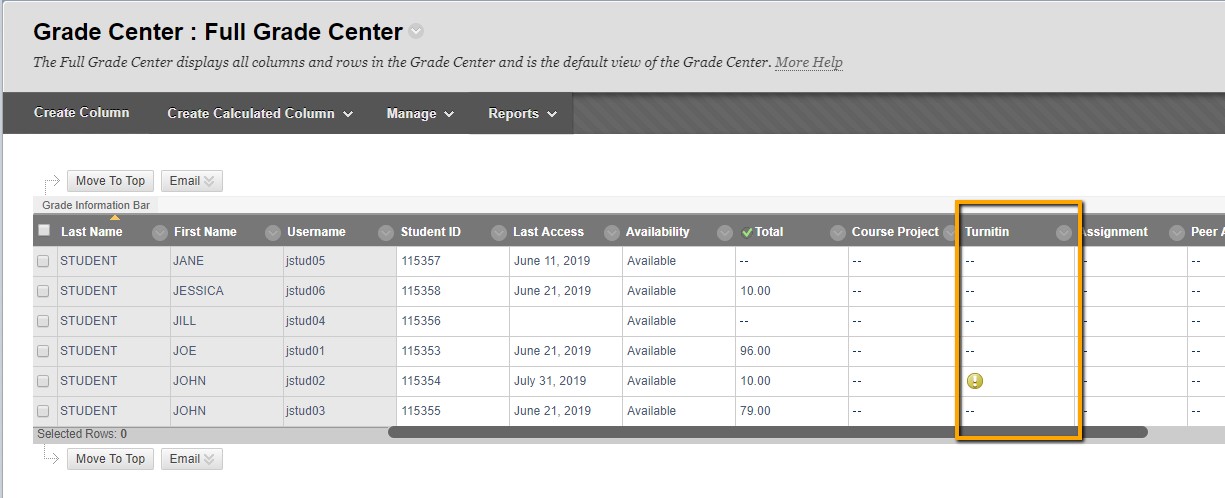
Viewing Submitted Work:
The yellow Needs Grading icon will display when students have submitted work.
Use the gray Click for More Options arrow to view a student’s attempt.
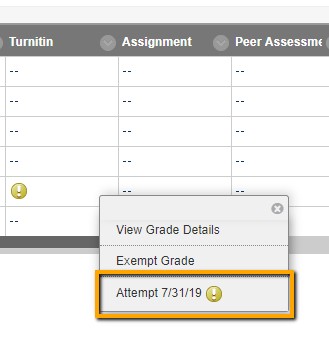
The Modify Grade page will now display. Here you can view the student’s paper, enter a grade, and add feedback. You may also clear an attempt, if needed.
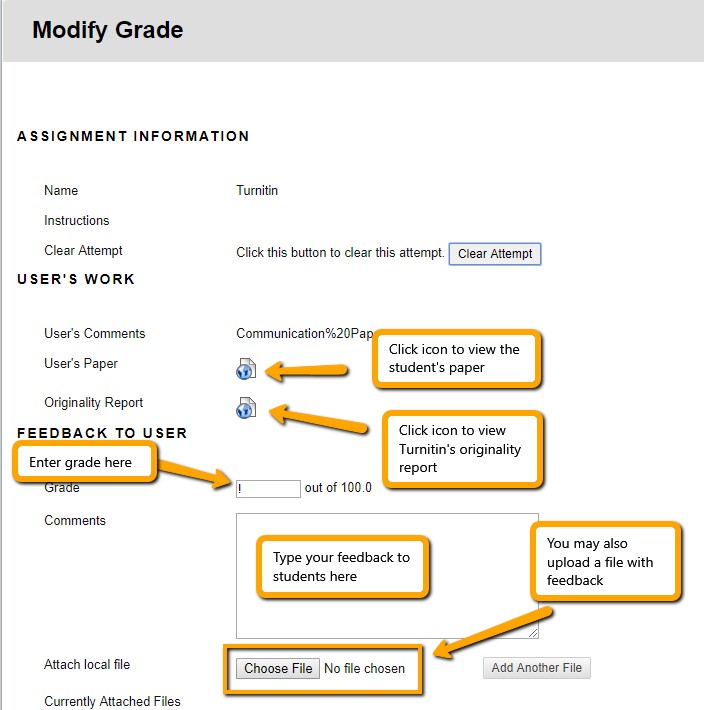
Reviewing Submissions and Adding Feedback:Clicking the icons next to User’s Paper and Originality Report on the Modify Grade page will allow you to review the student’s work and the Turnitin Report.
These options will also open Turnitin’s Feedback Studio.
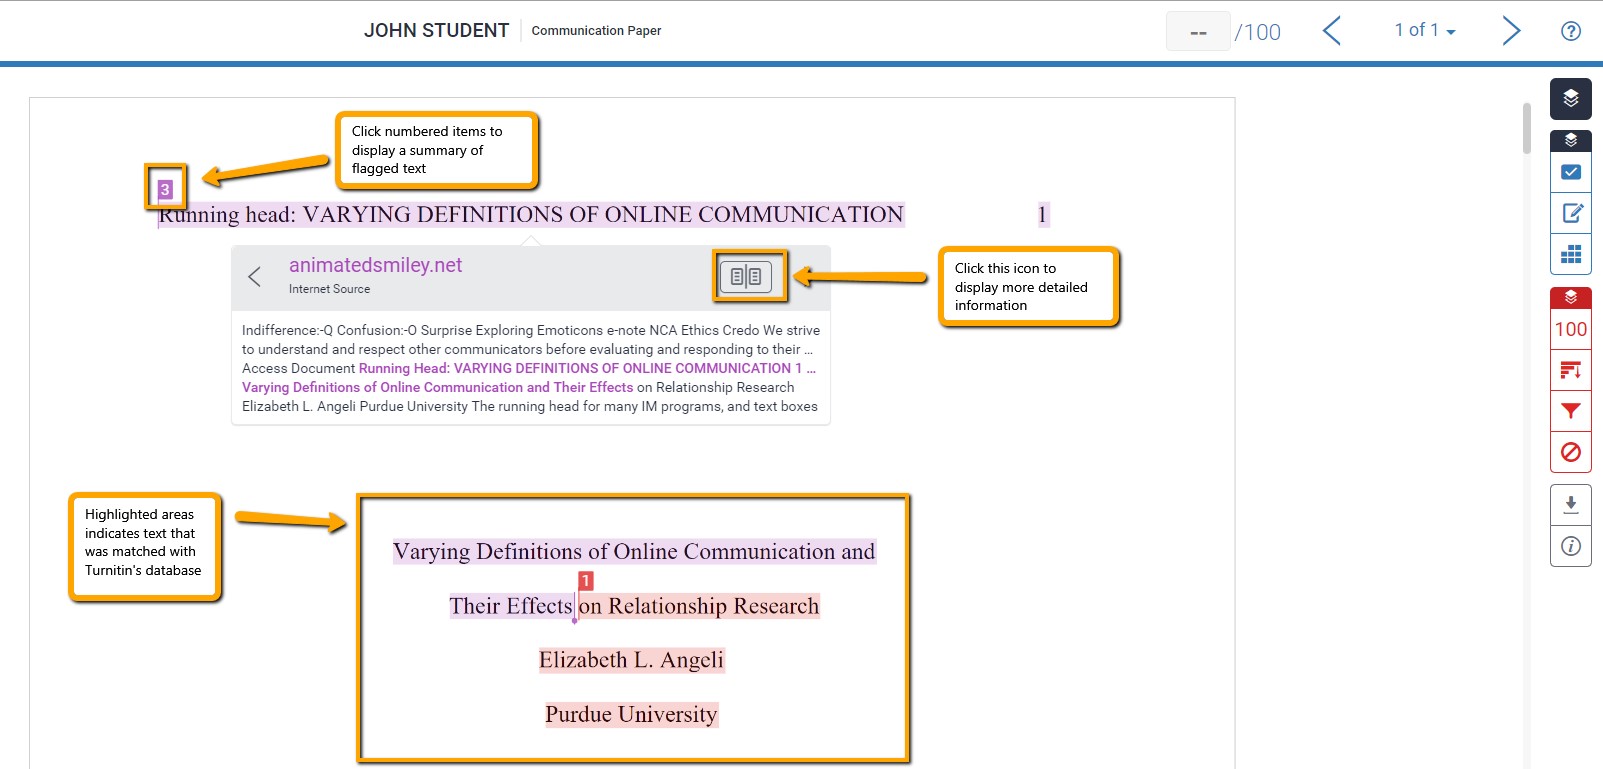
The originality report view will display highlighted text indicating items that were identified by Turnitin. Clicking the numbered items will allow you to view more details about the report:
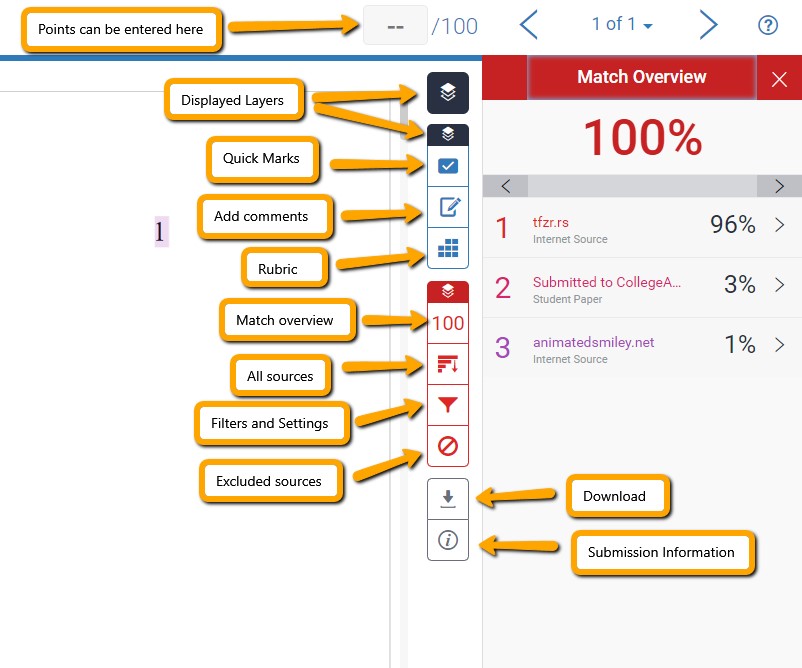
The menu on the right side of the Feedback Studio allows you to view more information about the paper, add comments, and add points. Note: Points will also need to be added in the Blackboard Grade Center to be calculated in the total.
If comments are added using the Feedback Studio, use the download option to share a copy with the student.
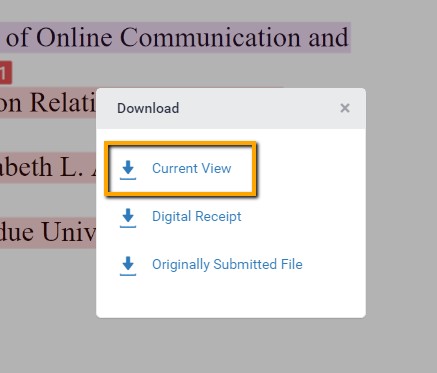
Downloading the Current View option will include the originality report, your comments and points in a PDF document.
Return to the Modify Grade page in Blackboard to finish grading and upload the annotated paper, or other attachments, if desired.
Be sure to enter a grade in the Feedback to User section.
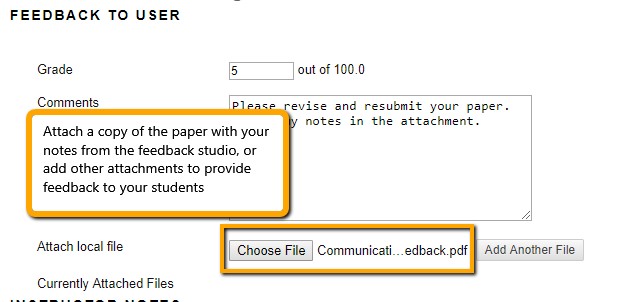
When you are finished grading, click Submit to save the grade and feedback.
The grade will now display in the Grade Center and students will be able to view your feedback.
- Creating a Custom Grade Center Column
-
Purpose Statement:
Creating a custom column in the Blackboard Grade Center is a very easy process and provides flexibility for using the Blackboard Grade Center with traditional courses. This document assumes that users are logged in to Blackboard and in a course.1. From the Control Panel, click Grade Center. The Grade Center menu displays.
2. From the Grade Center menu, click Full Grade Center. The Full Grade Center displays.

3. Click the Create Column button. The Create Grade Column page displays.

4. In the Column Name field, enter a name for the column. This is the display name for the column.
5. If desired, in the Grade Center Name field, enter an optional column name. This is optional.
6. If desired, in the Description field, enter a description of the column.
7. From the Primary Display drop-down, select the primary display for the column. Choices include Score, Percentage, Letter, and Complete/Incomplete.
8. If desired, from the Secondary Display drop-down menu, select a secondary display for the column. Choices include Percentage, Letter, and Complete/Incomplete.
9. In the Points Possible field, enter the total number of points for the column. This is a required field.
10. If desired, click the Add Rubric button to associate a rubric to the column.

11. If desired, in the Due Date field, select a date and time. It is recommended not to use a due date.
12. To Include this Column in Grade Center Calculations, click to select the Yes radio button.
13. To Show this Column to Students, click to select the Yes radio button.
14. To Show Statistics for this Column to Students in My Grades, click to select the Yes radio button.
15. Click the Submit button. The custom column is created and placed as the last column in the Grade Center.
- Setting up Weighted Grading
-
There are three steps that must be followed when setting up weighted grading. First, users must create custom categories, if necessary. Next, users must assign the custom categories to columns, if necessary. Finally, users must set up the weighted column. Procedural documents for these processes can be found within this section.
- Creating Custom Categories
- Assign Categories to Grade Center Columns
- Creating a Weighted Grade Center Column
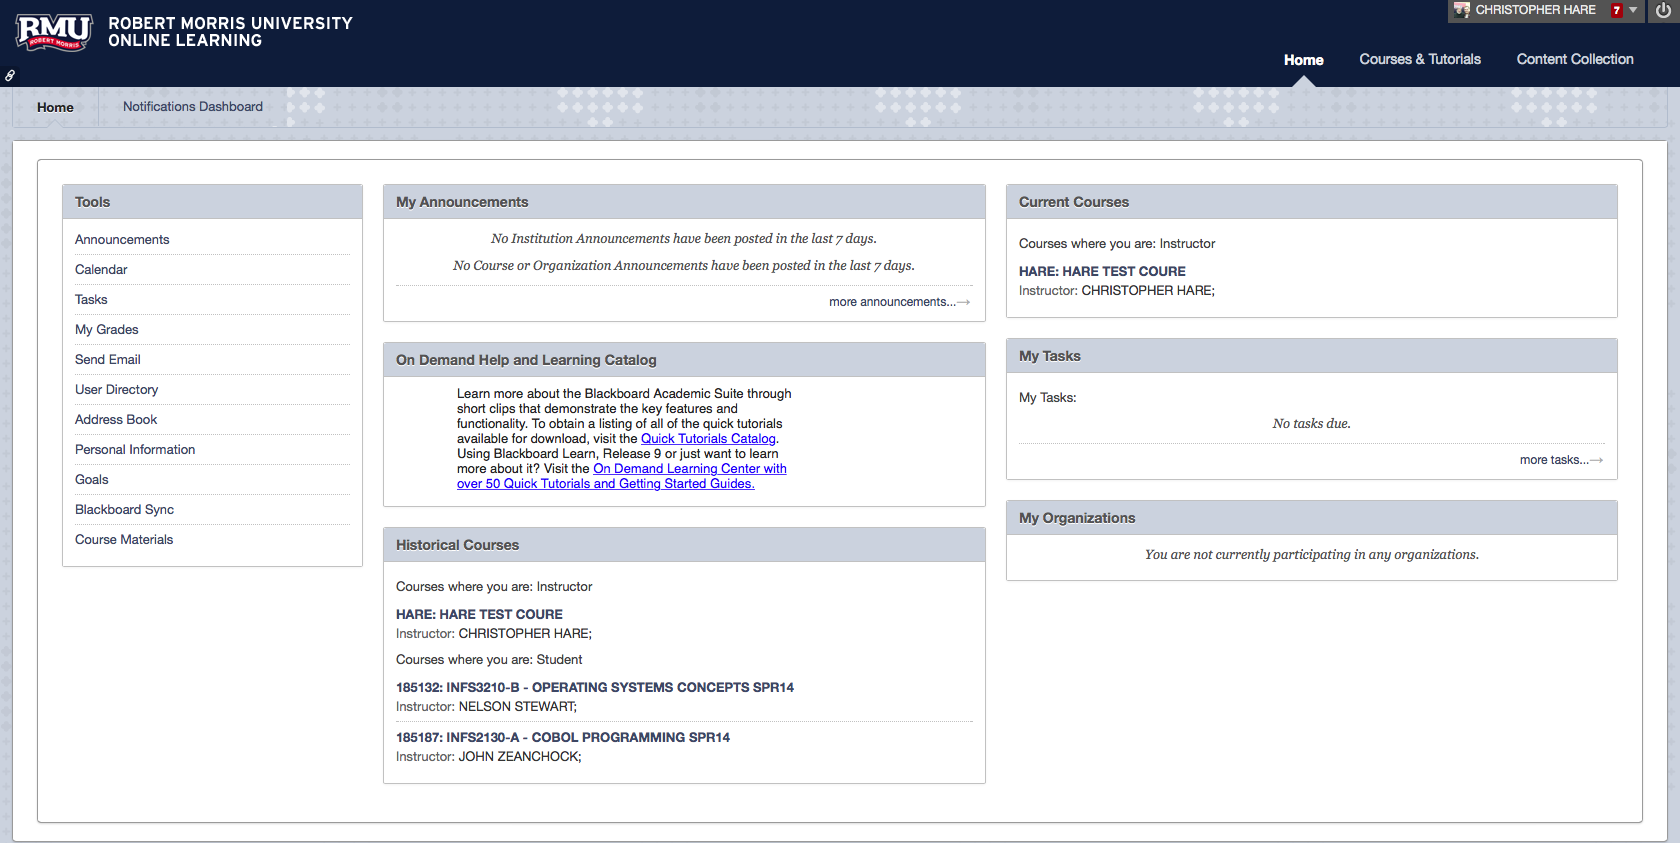
- Hiding Courses from the Current and Historical Courses Modules
-
Purpose Statement:
The purpose of this video demonstration is to show faculty how to hide older courses from both the Current Courses and Historical Courses modules on the Blackboard Home Page. - Importing a Publisher's Course Cartridge
-
Purpose Statement:
This procedural document is designed to show faculty how to import a publisher's course cartridge. If a publisher sends you a course cartridge code, this is the procedure that should be followed to ensure that it is imported correctly. This document assumes that the user is logged into Blackboard, and inside of a course shell.1. From the Control Panel, click the Packages and Utilities menu.
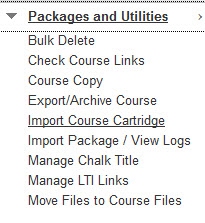
2. From the Packages and Utilities menu, click Import Course Cartridge.
3. In the Enter a Course Cartridge Download Key field, enter the cartridge code provided by the publisher.
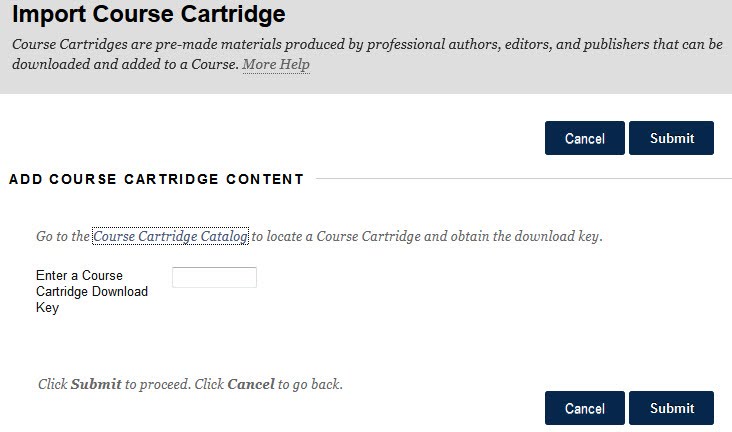
4. Click the Submit button. A message will be sent to you when the cartridge is finished importing.
5. Upon receiving the success message, access your course and the publisher's content will be available in your course.
- Importing a Test to Blackboard
-
Purpose Statement:
If instructors have exported tests from other Blackboard courses as .zip files, these .zip files can be imported into other Blackboard courses to create an exact copy of the test that was exported. This procedural document assumes that you are logged in to Blackboard and in the course from which the test will be exported.1. From the Control Panel, click Course Tools.
The Course Tools menu displays.

2. From the Course Tools menu, click Tests, Surveys, and Pools.
The Tests, Surveys and Pools page displays.

3. From the Tests, Surveys, and Pools page, click Tests.
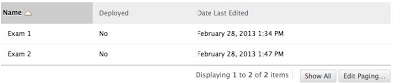
The Tests page displays.
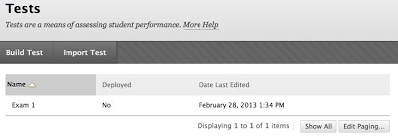
4. Click the Import Test button
The Test Import page displays.
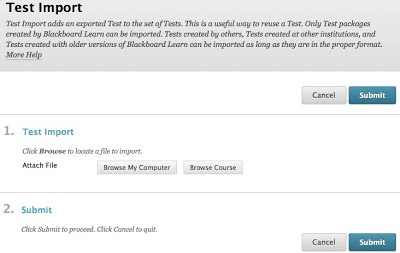
5. Click the Browse My Computer button.
6. Browse your computer to locate the zip file (exported test) to be uploaded. Once located, click to select it and click OK or Open.
The file name displays in the Selected File section.
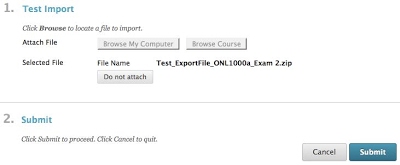
7. Click the Submit button.
8. The Test Import Complete page displays.
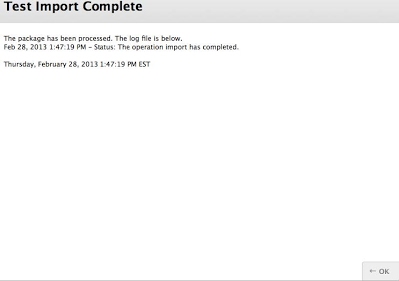
9. Click the OK button in the lower-right hand corner.
The test is added to the list of available tests in the course and can be deployed to any content area in the course.
- Logging In To Blackboard
-
1. Open a web browser.
NOTE: The preferred browser is Google Chrome. It can be downloaded from http://www.google.com/chrome
Mozilla Firefox is another preferred web browser and can be downloaded from https://www.mozilla.org/en-US/firefox/new/2. In the Address Bar, enter rmu.blackboard.com.
NOTE: Do not precede the web address with www.
3. Click the Log in with SSO button. The Single Sign-On page displays.
4. Enter your RMU Username and Password. This login is the same that is used to access your Gmail account.
5. Click the Sign In button. The Blackboard Home Page displays.

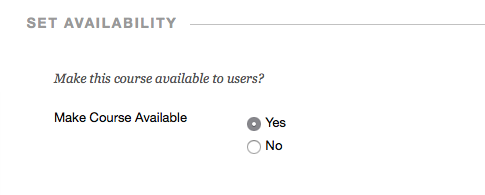
- Making Courses Available to Students
-
Purpose Statement:
The purpose of this document is to provide the steps necessary to make your course available at the beginning of the semester.1. Log in to Blackboard.
2. Access the course that needs to be made available.
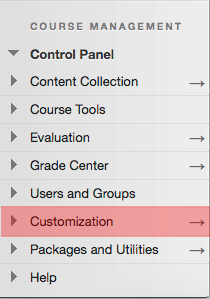
3. From the Control Panel, click Customization. (This menu is located on the lower left hand side of the screen below the course content menu.)
4. From the Customization menu, click Properties.
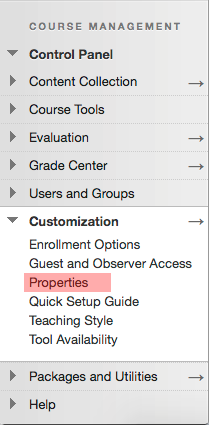
5. From the Set Availability section, click to select the Yes radio button.

6.
 Click the Submit button at the top of bottom of the page. The course is now available to students.
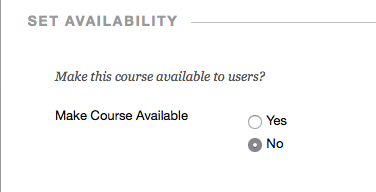
 - Making Courses Unavailable to Students
-
Purpose Statement:
The purpose of this document is to provide the steps necessary to make your course unavailable at the end of the semester.1. Log in to Blackboard.
2. Access the course that needs to be made available.
3. From the Control Panel, click Customization. (This menu is located on the lower left hand side of the screen below the course content menu.)
4. From the Customization menu, click Properties.

5. From the Set Availability section, click to select the No radio button.

6. Click the Submit button
 at the top of bottom of the page. The course is now unavailable to students.
 - Posting Information
-
- Posting Announcements
-
Purpose Statement:
The purpose of this document is to guide instructors through the process of posting announcements in Blackboard courses. This document assumes that instructors are already logged in to Blackboard and a course.1. From the Control Panel, click Course Tools.
2. From the Course Tools menu, click Announcements.
The Announcements page displays.

3. Click the Create Announcement button.
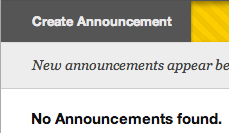
4. In the Subject field, enter a subject for the announcement.

5. In the Message field, enter the announcement text to be displayed to students.
6. In the Duration section, click to select either the Not Date Restricted or Date Restricted radio buttons.
IMPORTANT NOTE: If Not Date Restricted is selected the announcement displays immediately and remains displayed for the duration of the class. If Date Restricted is selected, instructors must use the Select Date Restrictions section to set dates and times.
7. If Not Date Restricted is selected, proceed to Step 10.
8. If Date Restricted is selected from the Select Date Restrictions section, set a Display After date and time by entering a date using the mm/dd/yyyy and hh:mm format.
9. If Date Restricted is selected from the Select Date Restrictions section, set a Display Until date and time by entering a date using the mm/dd/yyyy and hh:mm format.
10. From the Email Announcement section, click to select the Send a copy of this announcement immediately checkbox. Selecting that checkbox immediately emails a copy.
IMPORTANT NOTE: Selecting that checkbox immediately sends a copy of the announcement to students after the Submit button is clicked.
12.
 Click the Submit button to post the announcement for students.
 - Posting Your Own Response in Discussion Forums
-
Purpose Statement:
The purpose of this document is to walk an instructor through the process of responding or creating their own thread in a Discussion in Blackboard.1. The first step is to access the Discussion. Starting at the Home Page from within the course, Access the Discussion tab from the Main Course Menu. This is located on the left hand side of the screen. Click on “Discussion” Tab in order to enter.

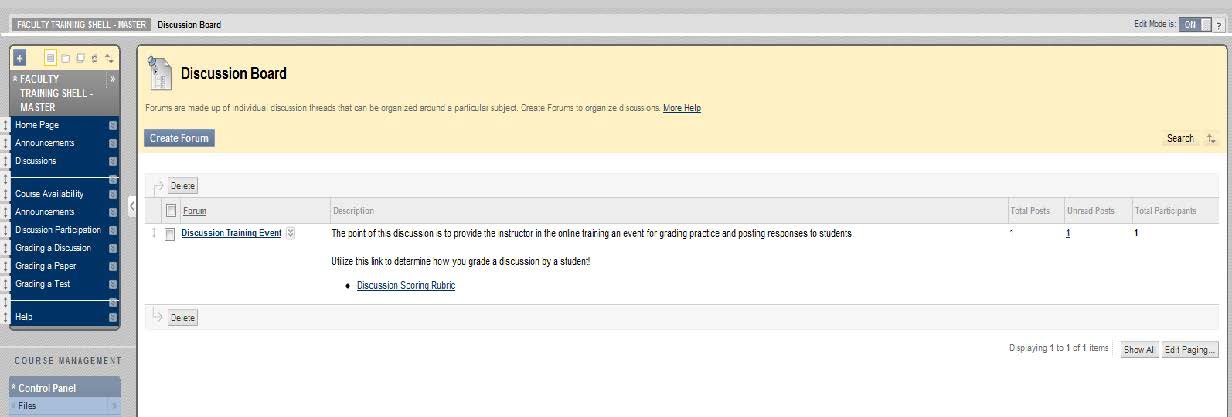
2. The following picture represents a view of the Discussion Area. All Discussions in a course can be seen from this view. In this example we only have one discussion.
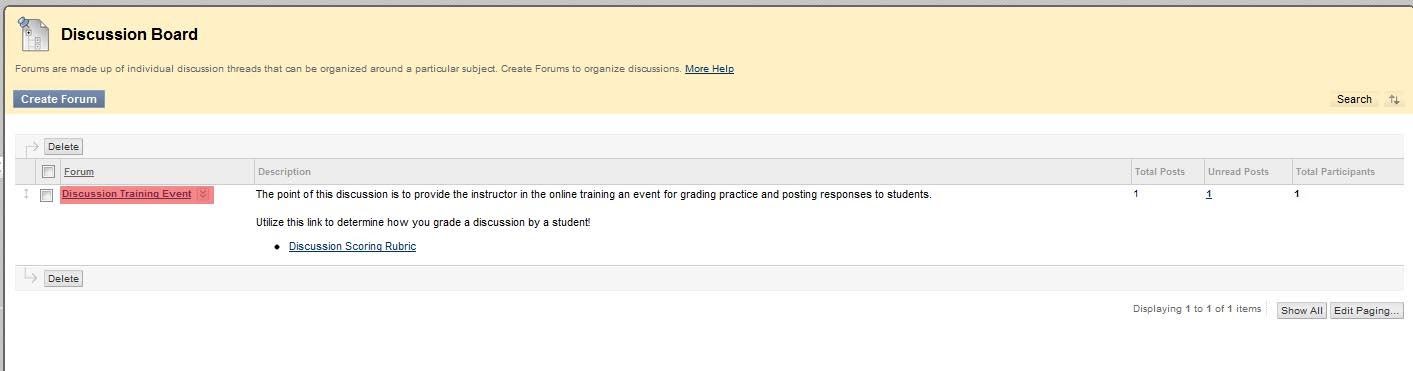
3. When you Mouse Over, or place your mouse, on the discussion, you can click on it to enter the actual discussion threads.

4. In order to create your own thread, or response, the original discussion question, Click on the “Create Thread” button highlighted below.
5. Once you have opened the View User Activity shown below, you will find (2) key areas:
1. Area (1) is where you would place a titled for your response.
2. Area (2) is where you would type the text for your for posting to the forum.
6. Once you have composed your response, do not forget to hit the “Submit” button in the upper or lower right hand corners of this view in order to save and make your work visible.

- Responding to a Student in a Discussion
-
Purpose Statement:
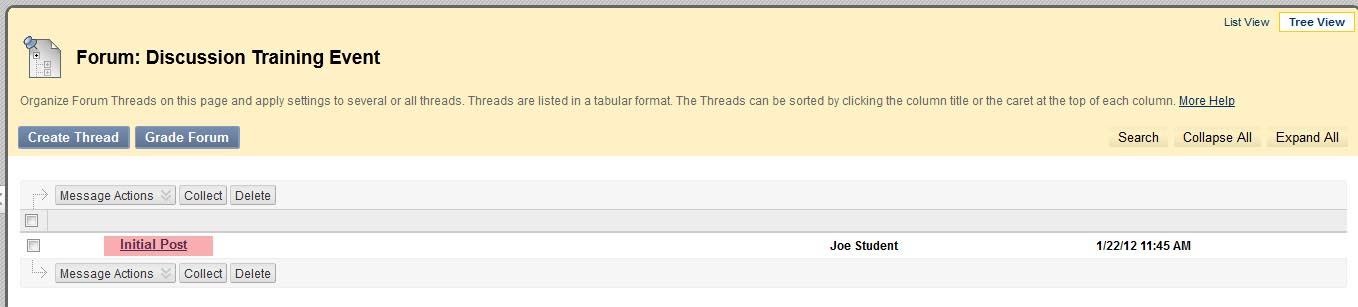
The purpose of this document is to walk an instructor through the process of responding to a Student in a Discussion in Blackboard.1. The first step is to access the Discussion. Starting at the Home Page from within the course, Access the Discussion tab from the Main Course Menu. This is located on the left hand side of the screen. Click on “Discussion” Tab in order to enter.
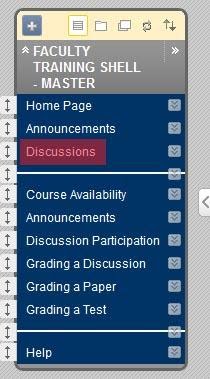
2. The following picture represents a view of the Discussion Area. All Discussions in a course can be seen from this view. In this example we only have one discussion.
3. When you Mouse Over, or place your mouse, on the discussion, you can click on it to enter the actual discussion threads.
4. In order to begin reading and responding to the threads, simply click on a thread to expand it to your view.
5. Once you have opened the View User Activity shown below, you will find (2) key areas:
1. Area (1) is the post, or thread, from the student for your review.
2. Area (2) is the button you click in order to post a reply. It is important to note that if other students have replied to this student, you will be able to see those listed in the window above the #2.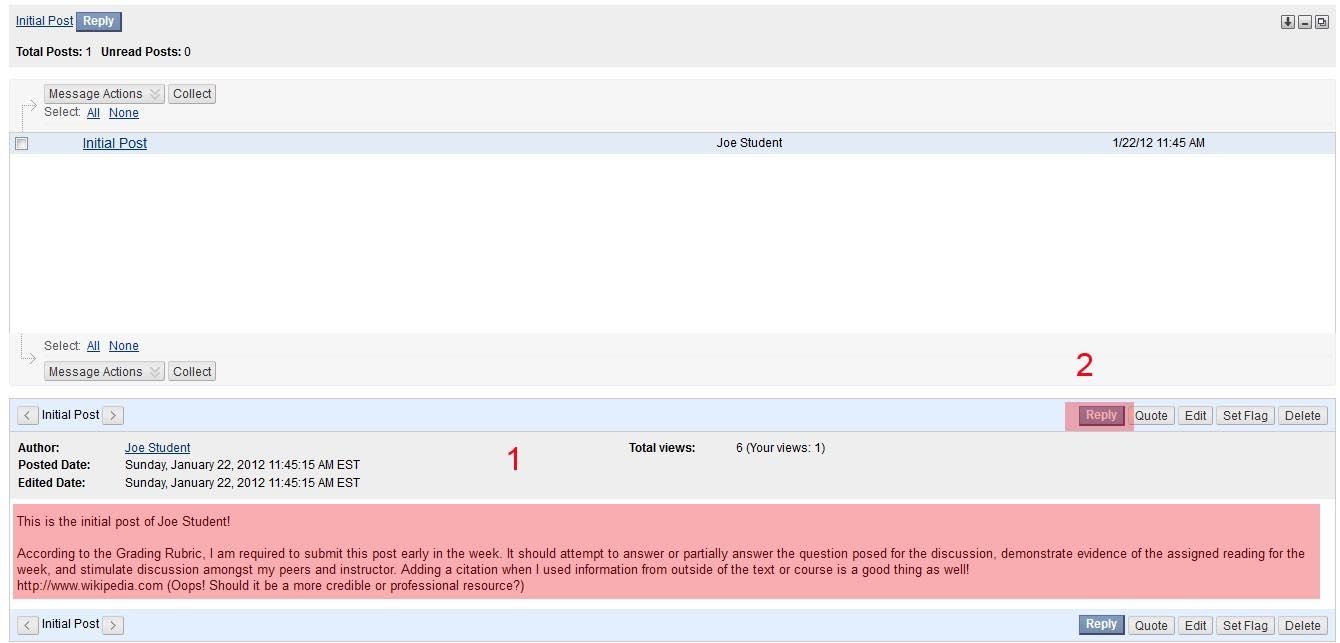
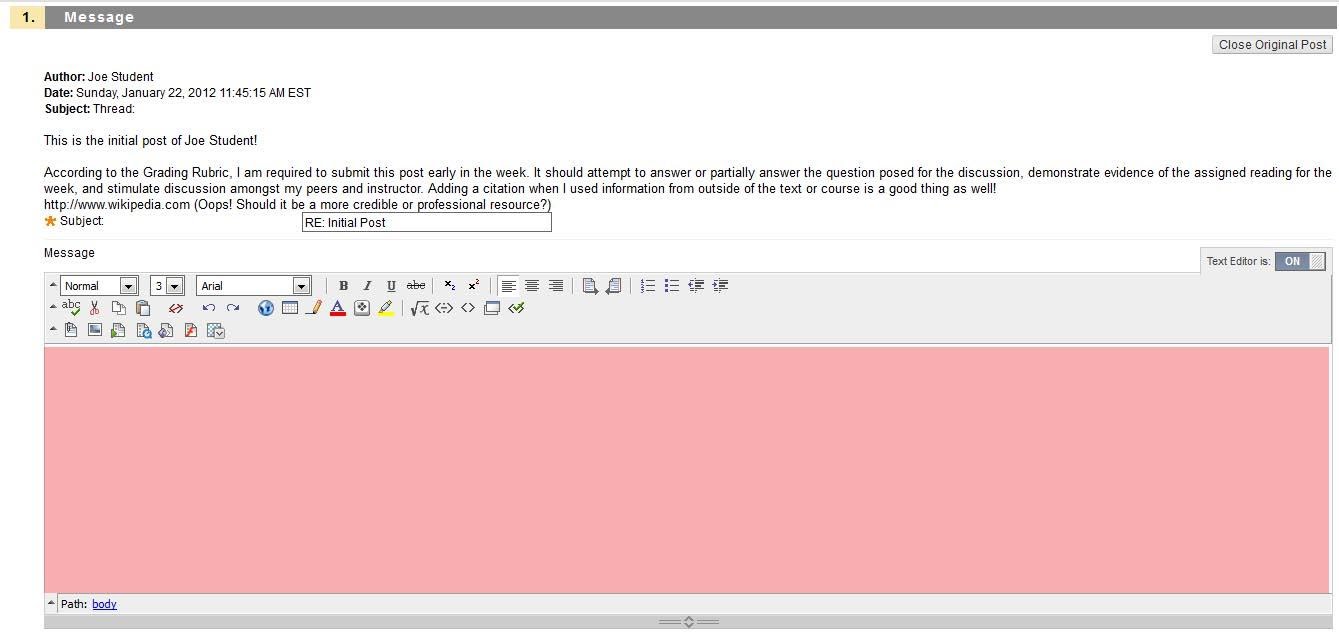
6. Once in the reply window, you simple enter your response to the student. A copy of the post from the student is supplied in the upper portion of this view for your convenience.
7. Finally, Do not forget to hit the “Submit” button in the lower right hand corner of this view in order to save and make your work visible.
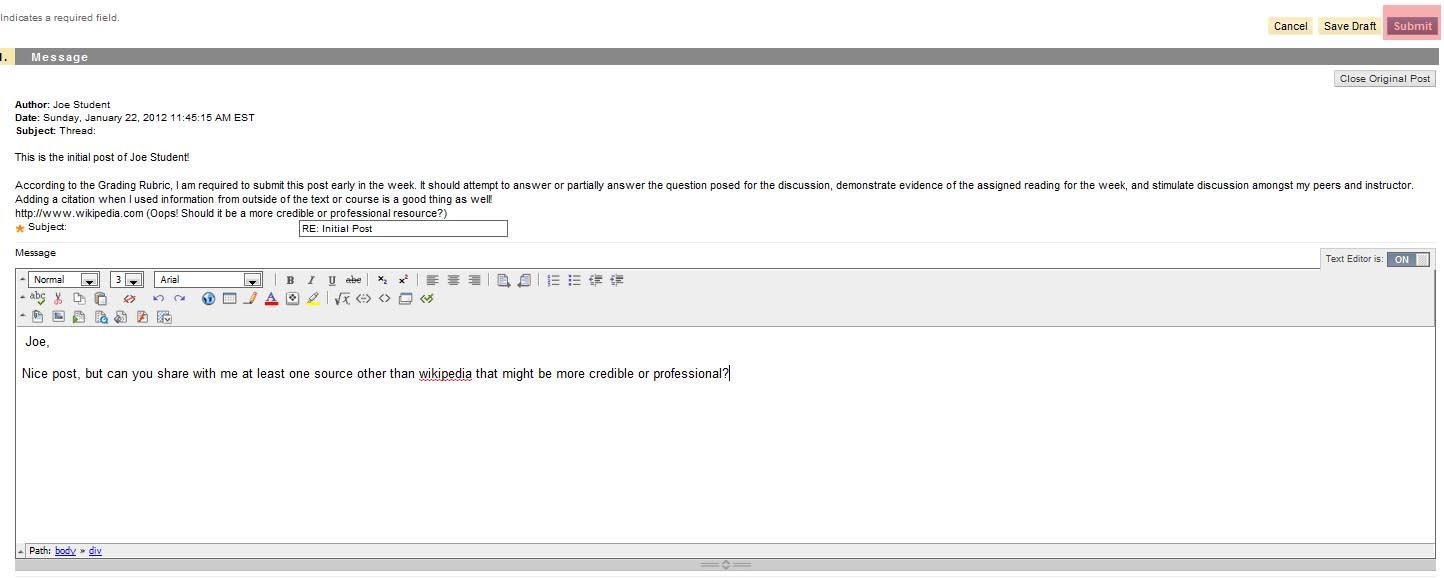
8. Once you have submitted your reply, you will see it listed beneath the student’s original thread or post.

- Respondus
-
- Utilizing Respondus to Create Blackboard Tests
-
The link below provides access to the Respondus Fully-Online Workshop created by RMU Online. The individual pages in this section provide direct access to the importing questions, modifying settings, publishing to Blackboard, and utilizing the Test Bank Network demonstrations.
- Importing Questions to Respondus
-
Purpose Statement:
The purpose of this demonstration is to show users how to import questions from Microsoft Word to Respondus 4.0. - Modifying Test Settings in Respondus
-
Purpose Statement:
The purpose of this demonstration is to show users how to modify test settings in Respondus 4.0. - Publish Tests to Blackboard
-
Purpose Statement:
The purpose of this demonstration is to show users how to publish test from Respondus 4.0 to Blackboard. - Using the Test Bank
-
Purpose Statement:
The purpose of this demonstration is to show users how to use the Test Bank Network in Respondus 4.0.
- Setting Up LockDown Browser
-
IMPORTANT NOTE: Be sure to give students the following link so they can install LockDown Browser to take the exam: https://www.respondus.com/lockdown/download.php?id=532632179
Purpose Statement:
The purpose of this document is to walk instructors through setting up Respondus LockDown Browser for use with tests in their courses. This document assumes that a test has already been created and instructors are logged in to their Blackboard course.1. From the Control Panel, click Course Tools.
The Course Tools menu displays.
2. From the Course Tools menu, click Respondus LockDown Browser.
The Respondus LockDown Browser Dashboard displays.
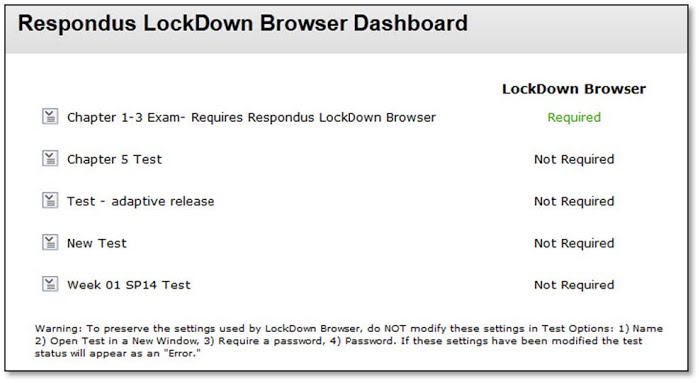
IMPORTANT NOTE: The dashboard shows which tests require LockDown Browser and which do not by showing Required in green text or Not Required in black text. This is found to the right of the test name.
3.
 Click the drop-down arrow to the left of the test to which LockDown Browser will be required.
 The context menu displays.
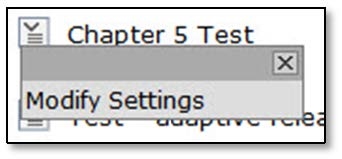
4. From the context menu, click Modify Settings.
The LockDown Browser Settings display.
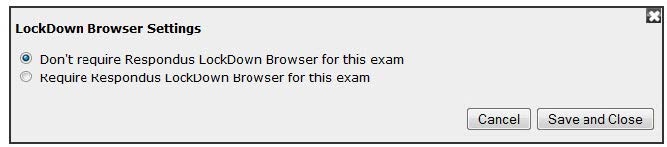
5. Click to select the Require Respondus LockDown Browser for this exam radio button.
Additional options display.
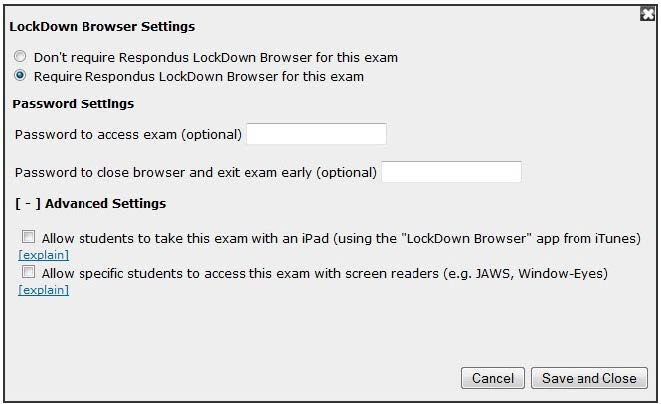
6. If desired, set an access password. This step is optional. If an access password is used, be sure to give it to the proctor or the students.
7. If desired, set an exit password. This step is optional.
8. Under Advanced Settings, select whether students can take the exam on an iPad. This step is optional.
9. Under Advanced Settings, select whether students who use screen readers can access the exam. This step is optional unless there is a student with a visual handicap in your course.
10. Click the Save and Close button.
The settings are saved and students must use LockDown Browser when taking the exam.

- Setting up Weighted Grading
-
Setting up Weighted Grading
There are three steps that must be followed when setting up weighted grading. First, users must create custom categories, if necessary. Next, users must assign the custom categories to columns, if necessary. Finally, users must set up the weighted column. Procedural documents for these processes can be found within this section.
-
Creating Custom Categories
-
Purpose Statement:
This is the first step in creating a weighted column in the Blackboard Grade Center. Blackboard provides standard categories that are automatically assigned as assessments are created. The included categories include assignment, blog, discussion, journal, survey, and test. Creating categories would be helpful for instructors who have multiple written assignments at a certain weight and have a final paper at a completely different weight. This document assumes that the instructor is logged in to Blackboard and in a course.
1. From the Control Panel, click Grade Center. The Grade Center menu displays.
2. From the Grade Center menu, click Full Grade Center. The Full Grade Center displays.

3. Hover the mouse over the Manage button. The Manage menu displays.
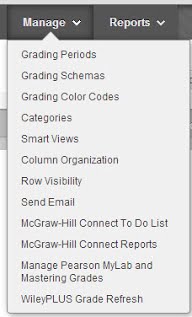
4. From the Manage menu, click Categories. The Categories page displays.
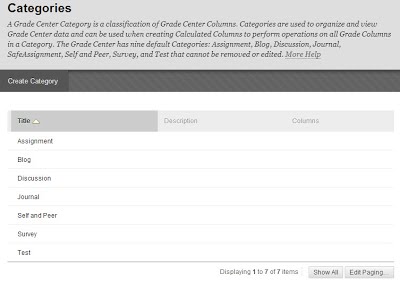
5. Click the Create Category button. The Create Category page displays.

6. In the Name field, enter a name for the category.
7. If desired, in the Description field, enter a description of the category.
8. Click the Submit. button. The custom category is added to the list of existing categories.
-
Assign Categories to Grade Center Columns
-
Purpose Statement:
After creating custom categories, instructors can assign the categories to the Grade Center columns to which they apply. This is the second step in creating a weighted column. This document assumes that the instructor is logged in to Blackboard and in a course.
1. From the Control Panel, click Grade Center. The Grade Center menu displays.
2. From the Grade Center menu, click Full Grade Center. The Full Grade Center displays.
3. Hover the mouse over the column to be modified. In this example it is the Final Paper column.
4. Click the drop-down arrow to access the Column menu. The Column menu displays.
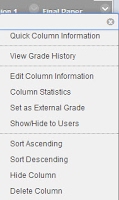
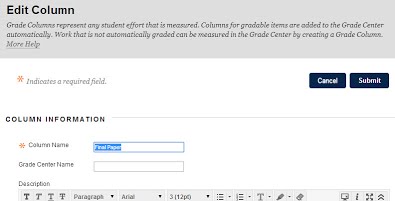
5. Click the Edit Column Information link. The Edit Column page displays.

6. Scroll down to the Category drop-down menu.
7. Click the Category drop-down menu. The Category menu displays.
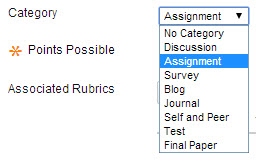
8. Click to select the new category. In this example, Final Paper was selected.
9. Click the Submit button. The column is updated to reflect the change in category.
-
Creating a Weighted Grade Center Column
-
Purpose Statement:
After creating categories and assigning them to the Grade Center columns, it is time to create the weighted column. Every Blackboard Grade Center already includes a weighted column, so this document shows how to edit the existing weighted column. This document assumes the instructor is logged in to Blackboard and in a course.1. From the Control Panel, click Grade Center. The Grade Center menu displays.
2. From the Grade Center menu, click Full Grade Center. The Full Grade Center displays.
3. Hover the mouse over the Weighted Total column.
4. Click the drop-down arrow to access the Column menu. The Column menu displays.
5. Click the Edit Column Information link. The Edit Weighted Column page displays.
6. From the Primary Display drop-down menu, click to select Score.
7. From the Secondary Display drop-down menu, click to select Percentage.
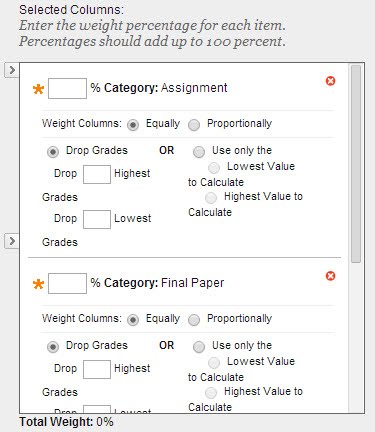
8. Scroll to the Select Columns section. This is where the weighting is set.
IMPORTANT NOTE: Weighted columns can be weighted by individual column or by category. The easiest way to weight grading is by category because it takes into account all columns with the category designation. For the purpose of this document, the process for weighting by category will be shown.
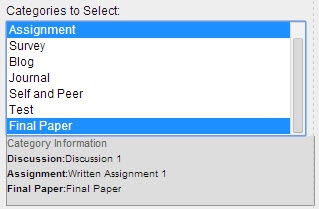
9. From the Categories to Select section, click to select the categories to be used.
10. Click the right-facing arrow to move the selected categories to the Selected Columns section. The selected categories display in the Selected Columns section.
11. For each selected category, in the % Category field, place the numeric value of the percentage. For this document, Assignments are 40%, Discussions are 35%, and the Final Paper is 25%.
IMPORTANT NOTE: All percentages entered must add up to 100%.
12. For each selected category, click to select either the Equally or Proportionally radio button. This tells Blackboard how to weight the column.
IMPORTANT NOTE: To apply equal value to all columns within a category, ensure that Equally is selected. To apply the appropriate value to a column based on its points compared to the other columns in the category, ensure that Proportionally is selected.
13. Click to select either the Drop Grades or Use only the radio buttons, depending on how you want the final grade weighted.
IMPORTANT NOTE: Drop Grades removes a number of either the highest or lowest grades for each category from the calculation. If you do not type numbers in the boxes, no grades are dropped. Use only the Lowest -OR- Highest Value to Calculate removes all grades from the calculation except for the best or worst score.
14. If the Total Weight is equal to 100%, click the Submit button. The weighted column is updated and will display the weighted grade to students.
For additional assistance on Grade Center columns, please visit the following site: Blackboard Grade Center Columns.
-
- Technical Support for Blackboard
-
Technical Support for Blackboard
By Phone: (412) 397-2211 By Email: help@rmu.edu
The IT Help Desk can assist with most Blackboard questions. If you have a problem that cannot be resolved by the Help Desk, it will be escalated appropriately for resolution. Please call (412) 397-2211 or email to help@rmu.edu. You can also click here for additional IT help.
- Forgot Your Password?
-
Blackboard uses Single Sign On (SSO). If you have forgotten your password, there are two options for resetting it:
Option 1 is to reset it online.
Option 2 is to call the IT Help Desk at 412-397-2211 for assistance resetting it.
IMPORTANT NOTE: Your RMU account must be active to log in to Blackboard. When you change your RMU password, your Blackboard password will also change. Your username and password are the same as your Sentry Secured Services username and password.
- Using the Youtube Mashup Tool
-
Purpose Statement:
This work instruction shows users how to integrate YouTube videos into Blackboard courses using the YouTube Mashup tool. This document assumes that the user is logged into Blackboard and inside of a course shell.1.
 Hover the mouse over the Build Content button.
 The Build Content menu displays.

2. From the Mashups section of the second column, click the YouTube Video link.
The Search for a YouTube Video page displays.
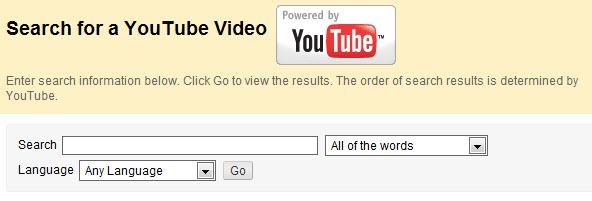
3. In the Search field, enter a one or two word description of the video.
NOTE: Use the other search options to narrow the results of the search.
4.
 Click the Go button.
The search results display.
5. To preview the video, click the Preview button for the video to be previewed.6. Click the Select button for the video to be selected.
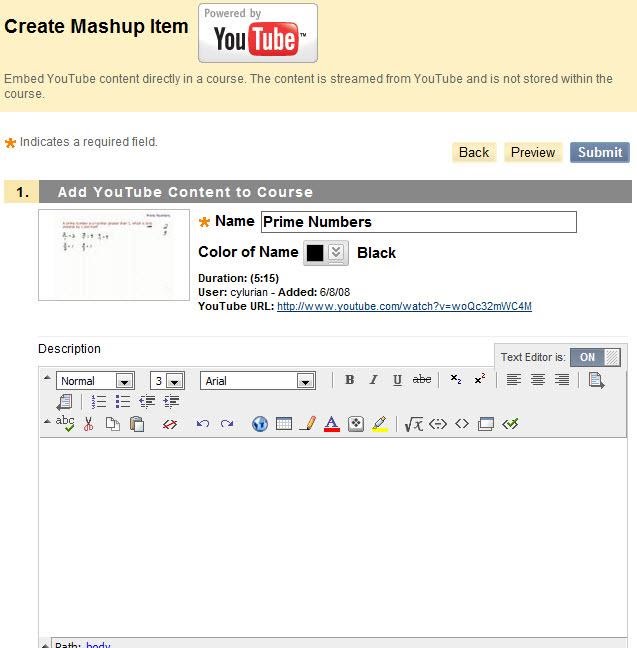
The Create Mashup Item page displays.
7. If desired, in the Name field, change the name of the item.
8. If desired, in the Description field, add a description of the video.
9. In the Mashup Options section, accept all defaults.
10. If desired, from the Attach or Link Content section, attach a file to the item.
11. From the Options section, accept all defaults.
IMPORTANT NOTE: All defaults do not have to be accepted if restrictions must be placed on the item.
12.
 Click the Submit button. The YouTube Video Mashup item is successfully created.


Technical Support for Blackboard
Phone: (412) 397-2211 Email: help@rmu.edu
The IT Help Desk can assist with most basic Blackboard needs including password issues, questions regarding navigation inside the course and submission of assignments.